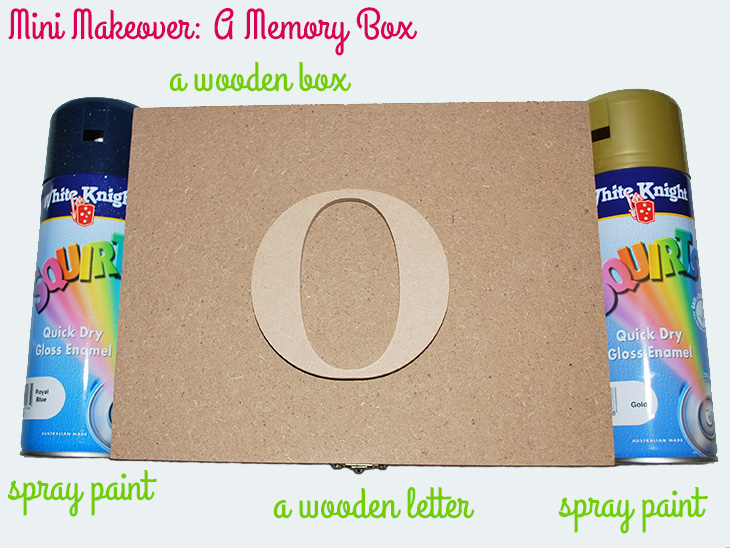
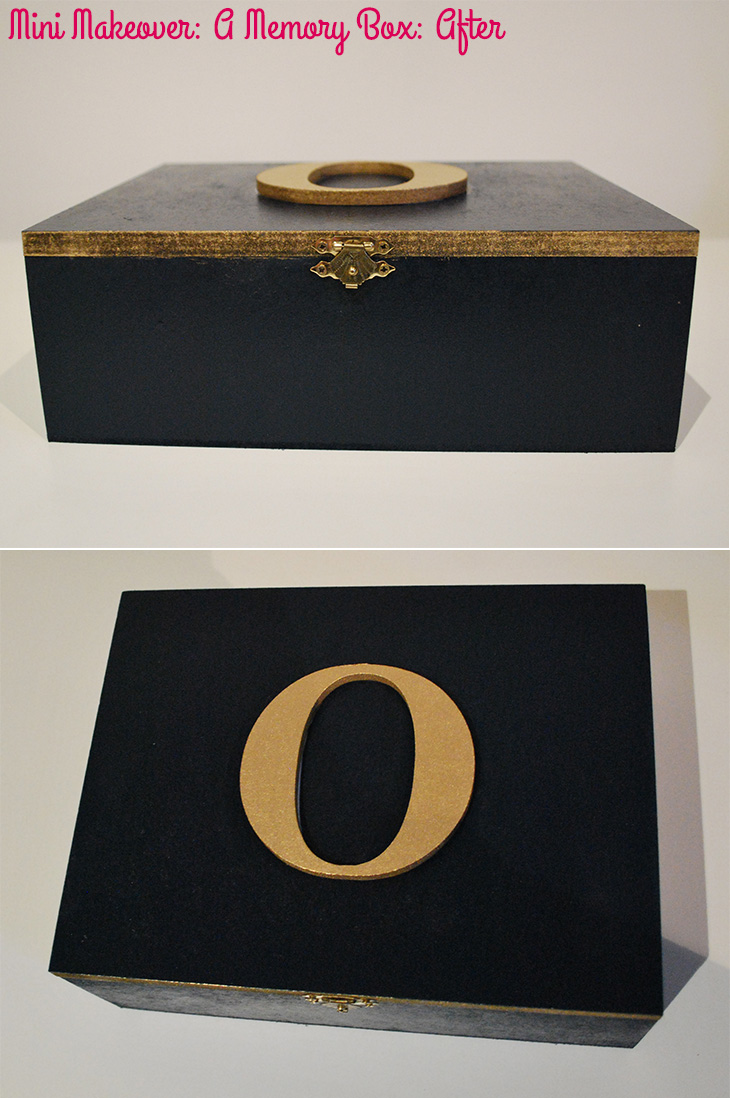
Today I wanted to share with you a special gift that I made just a couple of weeks ago for my god daughter (and cousin) for her first communion: a memory box.

Even though this was for a religious celebration I think it is a great special gift for kids of all ages as they love a place to keep the things that mean something special to them. I still have one from my 10th birthday that I love to this day. It could even be something you make for you own children’s rooms.
What you’ll need:
- A Wooden Box – I got mine at Bunnings (similar to Home Depot or B&Q for you non Aussies) for $15.45 in the craft section. They initially told me at the desk that they don’t sell them, but they do. So if they tell you that too, just ask for the craft supplies isle.
- A Wooden Letter/Initial – I also got this at Bunnings in the craft section for $1.83 for a large letter.
- Cans of Spray Paint in your colours of choice – I chose a Navy Blue for the main colour and gold for the initial and some edging. I got mine from the Bunnings paint section for $7.52 each. You could also use paint pots but I was in a hurry and the spray paint was quick drying.
- PVA (woodworkers) Glue – We had this at home already but most hardware stores and supermarkets have it
- Small (1cm) artists paintbrush – For any paint touch-ups. I’ll admit that I didn’t have this initially, but I really wish I had thought of it earlier.
- Small screwdriver – To remove and then replace the hinges and latch.
- Painter’s Tape (optional) – For edging.
I left it to the last day to make this present, as I only really decided on the day that it would be the perfect gift so the whole process was a lot like putting the tracks down as the train is rolling in. I’d advise, if you don’t like to be super stressed, to maybe do this a few days before you intend to gift it. A lesson I learned that goes with my organisation challenge
I started by using a small screwdriver to remove the hinges, screws and the latch pieces and putting them in a small lid so that they wouldn’t get lost. Then I grabbed an old (damaged) queen bed sheet and placed it on the grass (and later on the tall rubbish bins) as the spray paint drop sheet.
I’d never used spray paint before so I made sure to read the instructions and set the timer on my phone to one minute for shaking each can before spraying. Since I was so short on time I really didn’t want to take any shortcuts that might ruin the gift.
I started with the gold the letter O. I’m glad I started with it as it was easier to get the hang of the spray can on the smaller surface. Be sure to spray evenly across it and get the sides too. I think it’s good to go slowly until you get the distance between the timber and the spray can correct as you can cause it to run if you get too close. It needed 10 minutes to be touch dry, so I started on the box lid.
I decided that I was only spraying the outside of the box and not inside. You might prefer to do inside and out. I sprayed the top and the sides in the navy blue and left them to dry. On another drop sheet I also did the base and the sides in the navy blue. The box took quite a few coats before the blue was the colour I wanted so it probably took the best part of an hour.
I realised that the blue was soaking in around the edge of the lid and just wouldn’t give me the colour that I wanted. So I decided that I would paint the edge gold. I was panicking a little bit by this stage as I was running out of time and I didn’t have a paint brush for the edges.
I grabbed a bit of A4 cardboard and put it over the lid and added the gold to 3 edges – the front and the two sides. The back was the perfect blue so I left it. Unfortunately the cardboard had lifted slightly and there was some gold on the top. After fretting (and waiting for it to dry) I got out the painter’s tape and taped over the gold and sprayed the top blue once more. Some of these steps could have been avoided had I thought it through first, but hopefully in sharing, you won’t make the same mistakes I did.
Whilst I was waiting for that to dry, one last time, I brought the base of the box inside, gave it a quick dry with my hair dryer just to make sure it was completely dry and added the bottom part of the hinges and latch. I turned it over to realise that some of the blue had sprayed on the edge of the inside and I realised that I really needed that paint brush now! Cue a panicked call to my Grandmother and a quick drive to pick up some brushes that weren’t as good as I had hoped, but would do.
I brought the lid of the box inside and got the hair dryer on it too, just to make sure. Then I attached the hinges to the top and the latch too. I sprayed some gold into the lid of the gold spray can (outside) and used that to carefully paint the inner lip of the box in gold. The gold, I found, hid any blue overspray really easily and nicely.
I then used a ruler to get the O in the centre of the box lid and glued the O down. The PVA dries clear in 30 minutes, but can get a bit messy. I used some napkins to carefully remove some of the excess glue that was around the edges before it dried.
I waited about 45 minutes, took these photos, then wrapped it and got ready to leave. Just in the nick of time!

I loved the way that it turned out, but it was a real miracle that nothing went really wrong. I was in shock that it actually looked like I’d hoped! Yay!
Here’s what I would do differently next time:
- Organise to do it on a sunny, warm day at least a week before it needs to be gifted
- Have all the tools ready at the beginning – especially that small paint brush
- Have plenty of time to do it at a slower pace
- Leave to air for at least a day so that your gift doesn’t smell strongly of paint and glue – lucky my cousin is a champ and didn’t mind
This could be a gift for girls or boys. You could choose a stencil instead of a wooden letter, or choose a number for their age or even make the box yourself. The colours don’t have to be what I chose, there are so many to choose from. I think theses make wonderful gifts that can last a lifetime. I think I’ll make another box similar to this in the future as they are a great all round gift.
Have you ever made or given something like this? Is this a tradition that you’d like to start? I’d love to hear!
If you do try this, I’d love to see a photo or hear about how it went! Tweet me your pics at: @danniellecresp or instagram me at: @dannielle with the hashtag: #styleaminimakeover
George definitely needs something like this!! For hospital band, bits of hair, stuff like that. I’ll have to wait a couple of months to get the letter though! :D
Yes! It would be awesome as a baby box! Can’t wait to find out what colours you decide on! :)
What a lovely gift! I want to make something like this, but maybe bigger to put all my travel tidbits in. One for each trip maybe, or one for each country…not sure yet but loving the inspiration!
A travel one would be fantastic! I have all my travel things in big plastic tubs, but I should really sort them into something nicer! Thanks Kate! x
Beautiful! I have a few from my childhood and they are very special. Great gift!
Thanks Sarah! I love that you have some special ones of your own!