*This Post is part of the #Brothergoespink Campaign for the National Breast Cancer Foundation
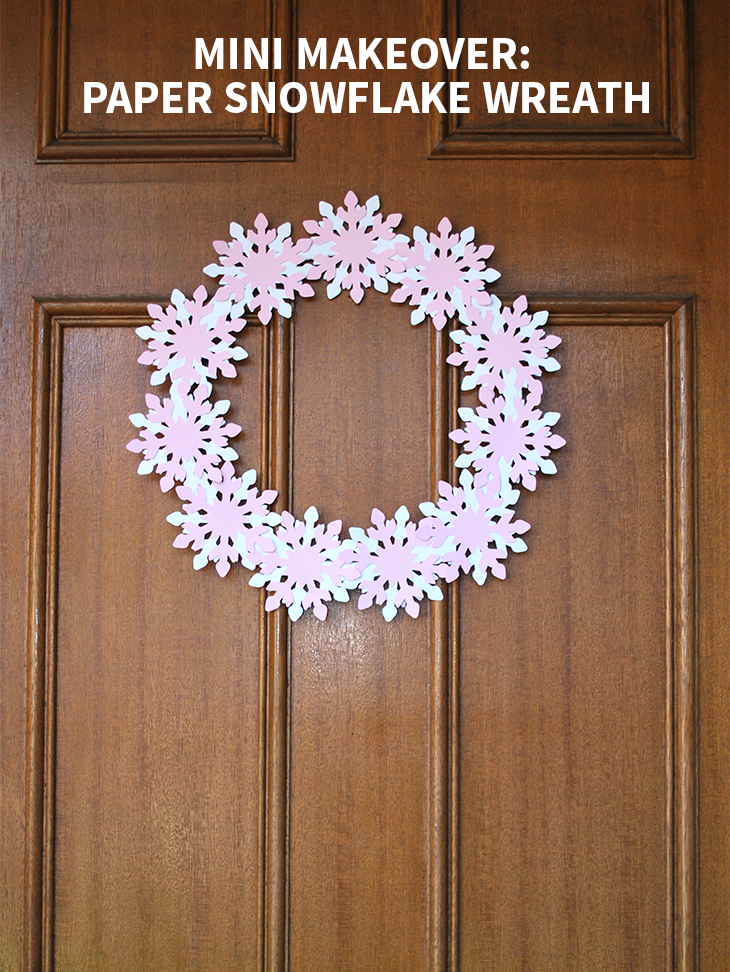
I was recently asked if I’d be part of the #Brothergoespink campaign for the National Breast Cancer Foundation and as it’s a cause that’s very dear to my heart, I jumped at the chance. They asked if I could create a Pink Christmas themed project and supplied me with one of their nifty ScanNCut machines to help make it happen. I chose to make a Paper snowflake wreath and here’s how you can too!

What you’ll need:
- Brother ScanNCut or small utility knife and cutting mat for cutting your shapes
- Circle Template Download it here and print two copies onto A4 paper (preferably 200gsm cardstock) on the A4 Borderless setting
- Pink & White Cardstock Both should be at least 200gsm
- Glue
- Scissors
- Sticky Tape
- Optional: Two A4 sheets of Cardboard for strengthening the wreath

How to:
Note: This tutorial is for the Brother ScanNCut if you don’t have one, make a snowflake template and cut out 11 pink snowflakes and 11 white snowflakes that are approximately 100m x 87mm using a utility knife and a cutting mat and skip to step 11 below.
- First set up your Brother ScanNCut (Standard blade set to 4 with the standard mat) and navigate to the snowflake pattern AR-A007 and make sure the size is 100mm x 87mm and hit OK
- On the next screen choose 6 for the number of repeats and hit Set. Note this is if you are using A4 paper, if you are using 12″x12″ you could select more
- Move the bottom right snowflake in slightly so that it doesn’t cut off the paper if you are using A4 paper. You can do this with your finger or the stylus
- Take a sheet of the pink cardstock and attach it to the standard mat and make sure there are no bubbles
- Line it up and use the feed button to feed it into the machine
- Hit Cut and then press the start/pause button and watch it go. A screen will let you know when it’s finished. Click the feed button again to release the mat
- First peel off the excess paper from around your newly cut snowflakes so you can see them
- Then using the spatula, carefully peel off the pink snowflakes
- Leave them to one side and repeat steps 4-8 once more so you have 12 pink snowflakes
- Then repeat steps 4-8 twice more with the white cardstock so you also have 12 white snowflakes
- Line your snowflakes up so that you have one white and one pink next to each other, you’ll need 11 of each for this tutorial so you should also have a spare pair
- Now take one pink snowflake and one white snowflake and place the pink over the top of the white so the white ends stick out between the pink as shown
- Glue the pink snowflake in the centre and attach it to the white snowflake and repeat until you have 11 two colour snowflakes (you should have a spare in case one gets damaged) Now leave them to one side whilst you make the backing for the wreath
- Take two copies of the circle template that you printed on white cardstock (A4 borderless) and line them up facing one another to check that they printed the same size
- Then cut each semi-circle out around the outside of the black line and place them on a table facing each other
- Using the sticky tape attach the ends together with no overlap (just touching ends) ready for the snowflakes
- Next, line the snowflakes up around the wreath as evenly as possible (without gluing them) and check the placement
- Once you’re happy with the placement of them you can start gluing them to the circular wreath until they are all glued down. Leave to dry if you need to
- Optional Step: If you want some extra stability, print two more copies of the circle template and cut them out of stiff cardboard and repeat step 16 to attach them together. Then sticky tape it to the back of the wreath
- Ta-da! Your paper snowflake wreath is ready for the wall or your front door this Christmas!

Thoughts on the project:
This was a really fun project to make and a bit of a challenge to come up with something that is pink and also Christmassy. I’ve not used a machine like the ScanNCut ever before and it was definitely faster than if I’d cut the snowflakes out myself. It was really easy to use, which I was quite surprised by. The instructions are really clear and I had it up and running in under 10 minutes. It’s a bit addictive once you start, but very fun!
The biggest challenge of this project was getting the snowflakes to line up around the wreath when I was gluing them, but I’m happy with how they turned out. It’s a fun Christmas craft that doesn’t take up a big chunk of time and looks great once finished!
Special thanks goes to Brother for having me be a part of the #brothergoespink #12daysofpink campaign for the National Breast Cancer Foundation who do very important work every day. Pop on over to see the campaign in full and what other crafters have contributed to it.
If you do try this, I’d love to see a photo or hear about how it went! Tweet me your pics at: @danniellecresp or instagram me at: @dannielle with the hashtag: #styleforahappyhome
Disclaimer: Brother approached me to be part of this campaign and they offered me a ScanNCut for being a part of #brothergoespink to help me create my project. I wasn’t paid for this post, and all opinions are my own, as always. xD