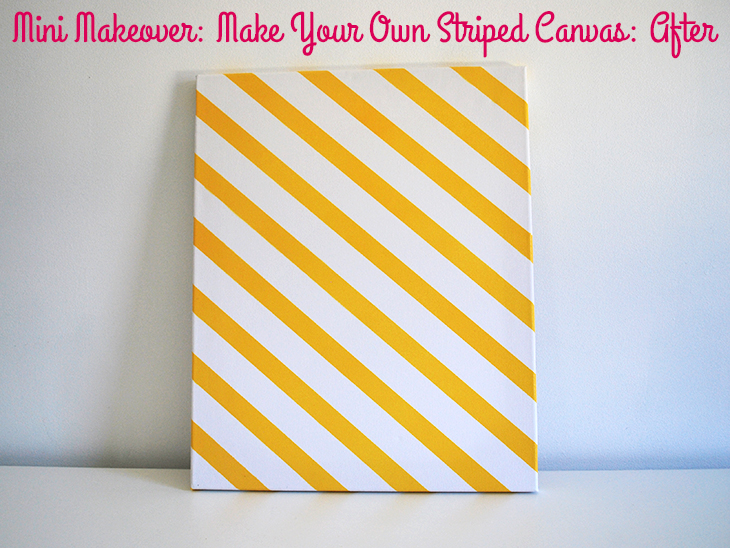
Today I wanted to share with you a fun way to make your own striped canvas for your home or as a gift for a friend. It can be done in less than a day with good weather and having the materials with you. I just love how this one turned out.

What you’ll need:
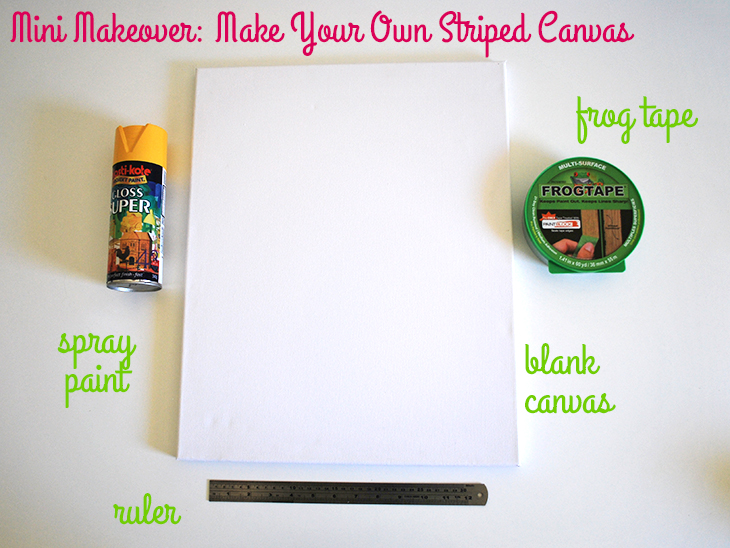
- Spray Paint I chose yellow that I bought previously from Masters was $12.27
- Blank Canvas I got this from my local discount store (similar to a dollar store) for $7.90 it’s 40cm x 50cm /15.7in x 19.6in in size
- Frogtape I bought this a while back at Masters for $8 it’s 36mm/1.41in in width
- Ruler and a pencil
- Optional: Cheap Masking Tape
- Your mini makeover essentials
How to:
- Take the Canvas, prop it up on a table so it’s easy to move around and add Frogtape to bottom corner, making sure to cover the edges and tape around to the back on each side
- Then use the ruler to measure the distance you want the coloured stripe to be and leave a tiny pencil mark where the next Frogtape line will start OR use some cheap masking tape that is the correct width and add to the canvas (I was planning on using the ruler, but the masking tape was the same width and much quicker)
- Measure out some more Frogtape for the next blank and add above the line of the cheap masking tape or the tiny pen mark and make sure the Frogtape is stuck down at the edges
- Remove the cheap masking tape from that first line and place it above the Frogtape and then lay a new line of Frogtape above it. Repeat until the canvas is covered with the frog tape where the white will be and the small stripes that will be painted are all left exposed. (Take care when doing the diagonal corners that they are covered correctly, pinch the tape in if needed)
- Smooth over all the Frogtape one more time and check that the edges have been properly covered so the stripe follows all the way around the edge and fixes at the back
- Take your project somewhere safe to spray (outside on a sunny day, with a drop sheet) and make sure that you are appropriately dressed (ie in something you wouldn’t mind getting covered in paint, because spray paint is messy. Use gloves if needed)
- Follow the spray can instructions on how to charge it up (the can I used needed one minute of solid shaking before starting any spraying)
- Pop the canvas up on something so that it is off the ground (and the drop sheet if you’re not just using the grass) so it’s easy to paint the edges. I used an old box for mine.
- Start spraying further away than you think necessary and see how the paint lands. Move in closer slowly until you feel that you are at a good distance and the paint is landing nicely. It’s important not to get too close or the paint won’t go on evenly. Take your time and shake the can as needed.
- Be sure to do the sides of the canvas as well as the top. This will give it more consistency when it’s hanging on the wall later on.
- Once you’re happy how the spray paint looks (no white coming through, looking even across the stripes), then it’s time to let it dry. The can I used said it needed a one hour(!!) touch dry, but some of the others I have say as little as 10 minutes. I checked on mine after 20 minutes on a 20°C day and it was touch dry, but check your can for their recommended drying times.
- When it’s completely dry, you can carefully start to peel off the Frogtape. Go gently doing this just in case there is still some paint that isn’t totally dry or has pooled a little at the tape. Pop the Frogtape scraps in the bin (trash).
- Have a good look at your handy work and get it ready to hang (or wrap up if it’s for a gift).
- Take a look at it on the wall and marvel at your awesome work. Now go have some tea and cake ;)

Thoughts on this project:
This is such a fun DIY project and is a great way to liven up your walls. I loved making this though I wish I had paid a little more attention to making sure the Frogtape’s edges were completely stuck down as I got a couple of fuzzy edges where they weren’t. I also forgot to check that the tape was covering the whole edge so there is just one that doesn’t follow all the way around. Thankfully, I love it even with the imperfections!
Getting the proper Frogtape that is coated is important if you don’t want the fuzzy edges as the paint can get through the non treated tapes. If you’re going to buy the tape especially for this project think about what size you want your white (blanked out) stripes and choose the right size tape accordingly. I used the 36mm/1.41in size Frogtape but I believe that it also comes in a thinner tape.
I originally thought I’d use a ruler to measure out the stripes that I wanted painted, but I quickly realised that the size I wanted was the same width as the cheap masking tape I already had on hand (25mm/1in). I say do whatever works best for the stripe widths that you want. I recommend using the cheap one simply because it doesn’t always stick so hard, so it’s easy to remove, and I feel less bad about using it for such a short time and then tearing it off and throwing out the used bits. We’ve had our masking tape about 5 years or so, so it doesn’t really matter.
I love the simplicity of this canvas but that it also looks great. It didn’t cost a whole lot of money as I already had a lot of the supplies on hand, but even if you don’t, it wouldn’t be a big expense – especially if you were going to make more than one, or keep the paint and tapes for other projects.
Have you ever made your own canvas? If you were going to try this, which colour would you pick? Tell me in the comments!
If you do try this, I’d love to see a photo or hear about how it went! Tweet me your pics at: @danniellecresp or instagram me at: @dannielle with the hashtag: #styleforahappyhome
Looks awesome! Easy project for your home (or gift!)
Thanks, Jane! x