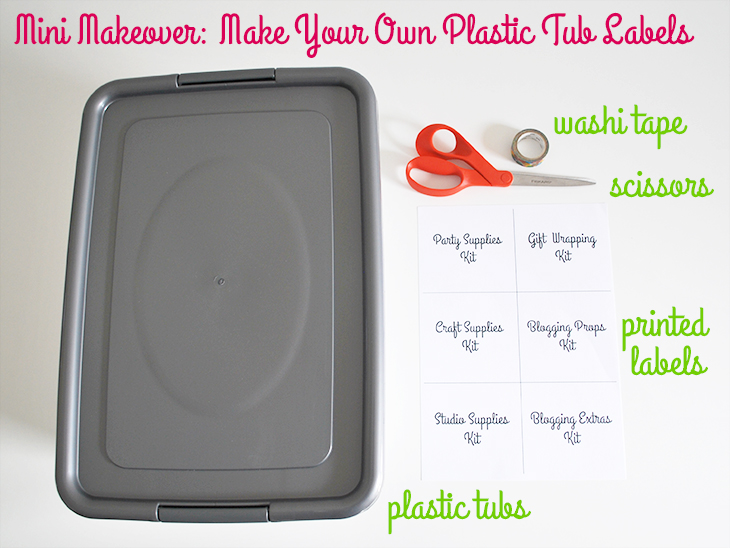
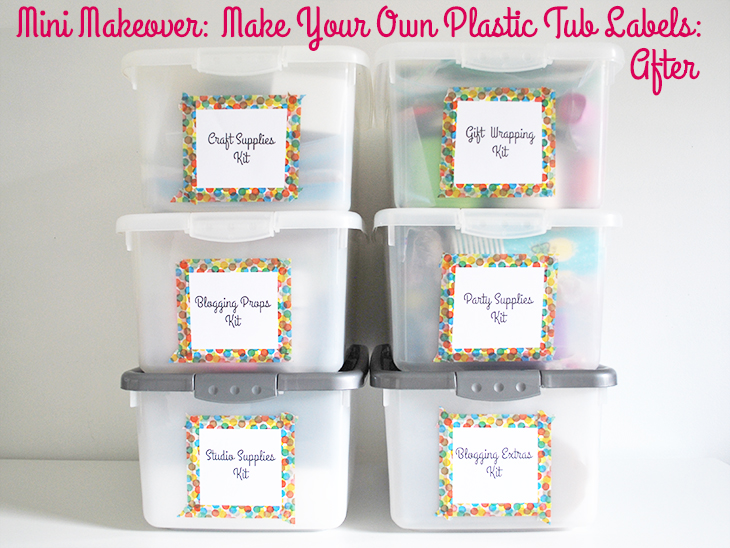
Today is a new month and with it comes a new theme! This month’s theme is: Organise My World and I thought it would be fun to kick it off with a simple tutorial to help you feel just that little bit more organised around the home, by making your own plastic tub labels! This seems so simple, but it’s something that we often put off because it seems like a lot of work to make the time to do it, so today I wanted to share how quick and easy it can be!

What you’ll need:
- Plastic Tubs in your preferred size These are 15litre tubs from KMart ($6 each)
- Printed Labels I made these in Photoshop but could be made in Word just as easily, printed on 200gsm paper
- Scissors for cutting the labels out
- Washi Tape This is from mt tapes (from memory it was $4.95 from the mt tapes pop up) – make sure to get one with a proper adhesive or the labels might not stick securely

How to:
- To make your labels, first decide how many you need (based on the number of tubs you have) and what you will label them. Then open Photoshop or Word, choose your preferred font(I like to use my blog’s heading font for my office labels) , and space them out evenly. If in Photoshop you can add lines for cutting in between. If using Word you could use text boxes for the same result
- Print them on a paper stock and colour of your choice. I chose 200gsm White paper as I like the extra paper weight. (Regular printer paper is 80gsm and looks and feels lighter/thinner). Cut them to size
- Take just one of the labels and add washi tape to each of the 4 sides. Leave about half of the washi tape width off the paper so you have something to stick it to the tub with. You can make your washi tape edges as neat or messy as you prefer. I chose messy tears
- For your first tub, line the label up in the centre of the tub edge that will be facing outwards in your storage area, I chose the short side, and stick the label down. Run your finger or thumb over the washi tape a couple of times to make sure that it is stuck securely. When doing the rest of the tubs, sit one on top of the first completed tub to line the labels up so that they will match when in the storage area.
Repeat Steps 3 & 4 until all tubs have their labels. Ta-Da! Your plastic tubs are now labelled and you should be able to find what you’re looking for much quicker!

Thoughts on the project:
This super simple mini makeover has made a big difference for me when I’m searching for something in particular. I’m often not too bad at remembering which tub something is in, but I’m not the greatest at recognising one from another when there are no labels. My tubs have two different coloured lids as the first 4 were purchased in 2010 for a different project and when I went back to buy more KMart were no longer selling the clear lids. I was a bit disappointed at first, because I like things that match, but in the end it doesn’t really matter as long as they do their job. It’s a good reminder for me that things don’t need to always be perfect to still be great.
I love that sometimes it’s the little things that can make a big difference when it comes to feeling a little more organised and a little less stressed. This is a really inexpensive and not too time consuming way for us all to take back a little control over the stuff in our lives. Hooray!
Do you label your tubs? What’s your method? Is this something that’s on your to-do list? I’d love to hear!
If you do try this, I’d love to see a photo or hear about how it went! Tweet me your pics at: @danniellecresp or instagram me at: @dannielle with the hashtag: #styleforahappyhome