Hand writing things might be going out of fashion in some parts but I still find that it’s the best way for me to get my ideas out of my head and make sense of them, so I love a good notebook or two. Unfortunately as I’m left handed and a lot of the fancy notebooks use the slippery paper that smudges ink, I end up getting the cheap notebooks with the plain paper and the not-so-pretty covers. To keep me inspired I like to cover them with old maps, so today I’m going to show you how you can too!

What you’ll need:
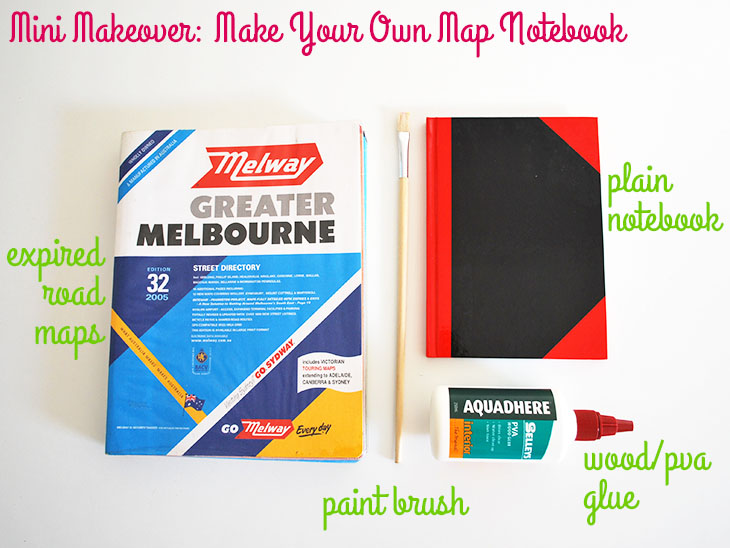
- Expired Road Maps This is a 2005 Melways from my old car, you may have one lying around or have an old atlas – thrift stores/op shops might have some too
- Plain Notebook I got this from a news agency for around $4.50. The paper stock is very similar to plain loose-leaf paper
- Paint Brush (for the glue) This was 70c from Masters Home Improvement
- Wood Glue (PVA) This is $5.38 for 250ml from Bunnings (also comes in other sizes)
- Scissors
- Newspaper or butcher’s paper for keeping your table clean

How to:
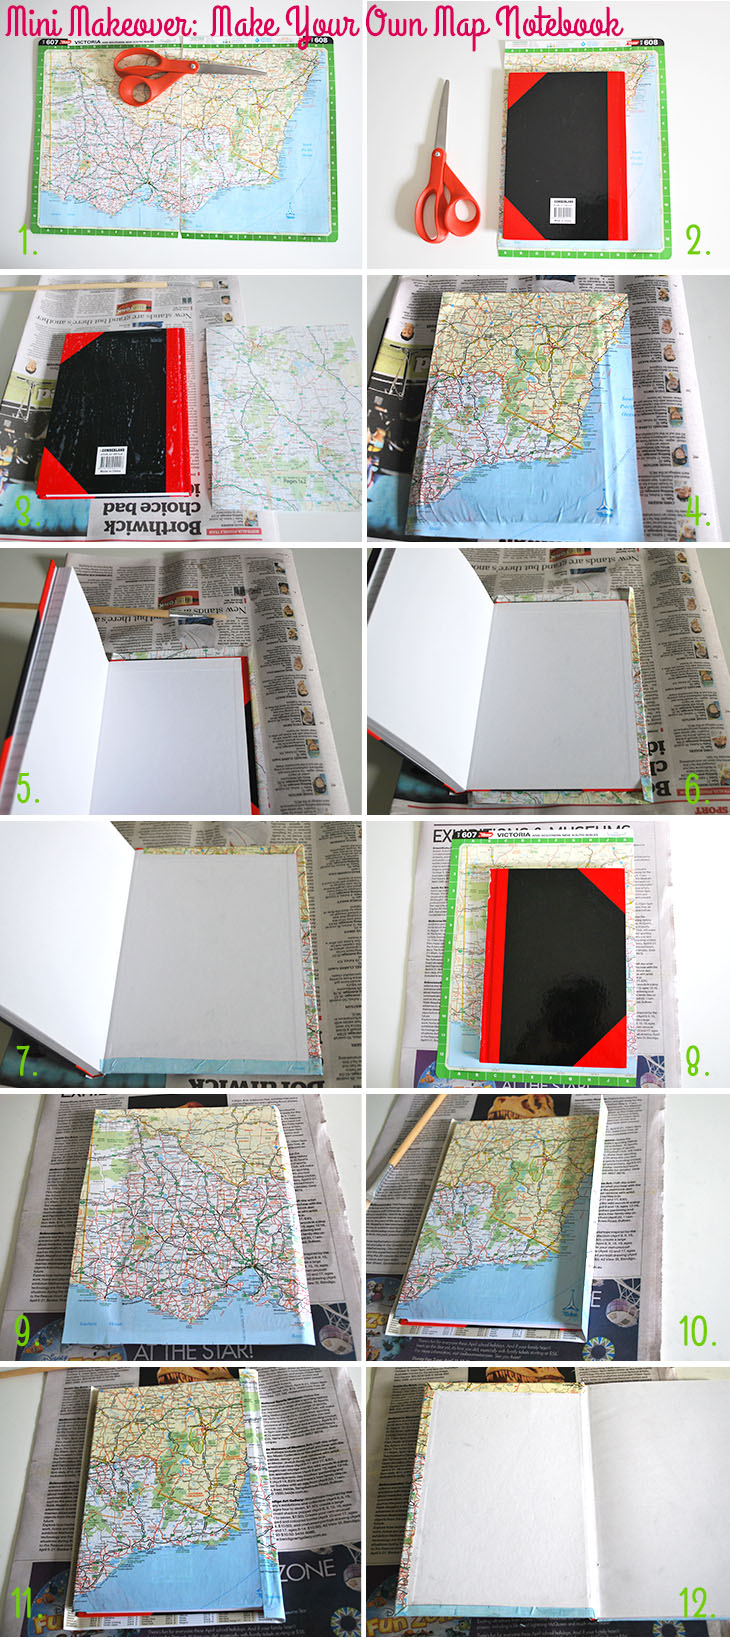
- Select the map pages you want to use and and cut them out as close to the binding as possible. Select which will be the front piece and which will be the back
- Take the piece that will be the back cover and lay it face up (image you want to see on the back facing up) and lay the notebook with the back facing up over it where you’d like them to line up (make sure the part of the map you really want to keep is inside the book area). Cut away the excess map leaving at least 2cm around the top, bottom and left, leave 2.5-3cm for the side that will wrap around the spine
- Shake your glue well and squeeze some out onto another sheet of newspaper or a small plastic sheet. Using the paint brush apply it to the back cover of the notebook Note: it shouldn’t look as watery as in my photo, I didn’t shake the glue enough so it was wetter than it should have been
- Carefully line up your map piece (with the side you want to show facing up) over the back cover of the notebook remembering to leave the 2cm margins at the top bottom and left. Once it’s stuck down, carefully run your hand over it to flatten it out Note: mine got a little too wet from the glue at the bottom corner so the red shows through a bit, but it shouldn’t if you shake the glue correctly
- Now turn it over so the back cover is on the table/newspaper with the cover closed. Use a little more glue on the spine and open out the cover and the note book pages so the spine is also flat on the table. Close it again and run your finger over the spine and the map so that it’s covered. It doesn’t matter if this is perfect as it will be covered later, but it gives your back map image a little more stability. Cut off any excess if needed. Also cut the excess piece at the top and bottom where the map folds around the spine (just where it can’t be folded in)
- Open the cover and the pages so they’re all upright once more (I used the closed glue bottle to rest the cover and pages on). Add some more glue to your paint brush and run a glue line down the outside edge. Fold the 2cm outside piece in and press it into the inside of the cover firmly. You can add another paint brush line of glue over the top to secure it if you like. Then use something like paper towel to wipe away any extra glue
- Next take the bottom edge and fold a triangle in at the outside corner. Then add some more glue to the paint brush and run a glue line across the bottom edge of the back cover and fold the 2cm edge into the back cover making sure it’s all stuck down. Repeat for the top edge
- Now it’s time to take the map that will make the front cover and lay it face up (like in step 2) line it up and leave the 3x 2cm excess but this time on the top, bottom and right side, and leave the 2.5-3cm excess for the side that will wrap around the spine
- Now repeat step 3 by adding the glue with the paint brush and line the cover up and carefully press it down remembering to leave the excess over hanging the edges. Flatten it carefully with your hands making sure to get the groove right before the spine
- Flip it over so that it is lying on the front cover and add a line of glue down the spine and fold the map on to it. Carefully run a finger down the spine to make sure that the glue has stuck
- Then add some more glue to your paint brush and affix the excess to the back cover. You could cut this off with a utility knife if you prefer, but I prefer it this way. Cut the excess piece at the top and bottom where the map folds around the spine (just where it can’t be folded in) and glue in the excess pieces to the inside of the back cover if you have any
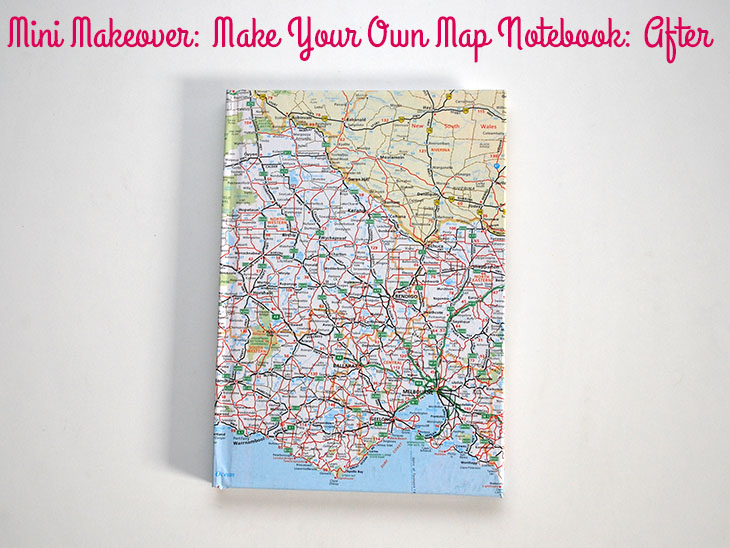
- Now repeat steps 6 and 7 for the inside of the front cover to glue down the excess pieces around the cover. Once it’s dry your new map notebook is ready for all the ideas in the world!

Thoughts on the project:
This is a really fun way to make your boring notebooks just that little bit more inspiring and uniquely you, as it’s unlikely anyone else will have exactly the same as you. You could use gift wrap or other coloured paper too if you didn’t want to use maps. If you were concerned about it getting dirty, you could add a clear contact over the top, though I have one that gets lugged around in my handbag and I haven’t noticed too much ‘wear and tear’.
I didn’t shake the glue enough before doing the back cover so it came out more water-like than it should have which made the paper a little soggy. I didn’t have that issue on the front cover though, so just remember to shake your bottle well before use! The glue also stinks like nobodies business, so a ventilated room (or one with a window) is a great idea. Your paint brush may never be the same after it’s had the glue on it, so I’d recommend having a glue one or at least not using your fancy ones!
This notebook would be a great gift for a travelling friend. You could put the country they’re travelling to on the cover so they can always remember their trip. I chose my home state to put on my cover to remind me that there’s still so much left to explore, but you could get creative with yours and have your own street or make one for each adventure you want to take.
Have you made anything like this before? What would you cover your notebook with? Tell me in the comments
If you do try this, I’d love to see a photo or hear about how it went! Tweet me your pics at: @danniellecresp or instagram me at: @dannielle with the hashtag: #styleforahappyhome
This is so great Dannielle! I love notebooks!
Thanks so much, Sarah! x