Last year I made some glitter foam letters for my Christmas stop motion video, and had so much fun doing it, I thought I’d show you how you can make your own too! I couldn’t find any foam letters in a font that I liked, so this was a great way for me to get what I was looking for and make a glitter mess too! I love a good glitter mess!

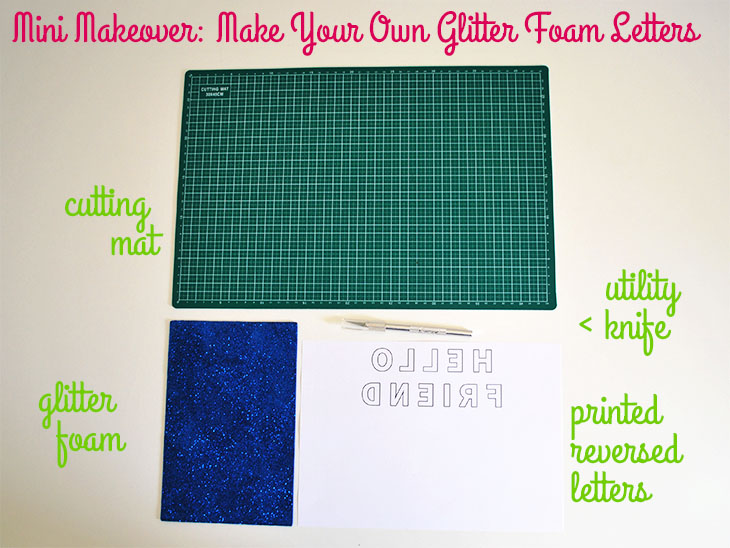
What you’ll need:
- A Cutting Mat I got mine from Masters for $10.04
- A Utility Knife I got mine from an arts supplies store for around $12, it is the Excel brand
- Glitter Foam I got mine in a pack of 12 colours from Spotlight in the small size (I can’t remember the exact price but I think they were around $5 per pack)
- Printed Reversed Letters with the words you’d like to make I used photoshop, but word and using the printer’s flip function would work just as well

How To:
- Collect all your materials in one place. Print out the letters of your choice. I chose to use the stroke feature on Photoshop to just print the outlines, but solid letters will work just as well. Leaving space between them is a good idea too. Be sure to choose the Flip or T-Shirt option on your printer so they print out backwards. Cut them into one word strips. Also place the glitter foam sheet glitter side down. I’m working from the bottom right corner moving up to the top right. Note: I’m left handed so you might need to do the left corners top to bottom if you’re a righty!
- Start by laying the first word over the end of the foam you’re working with on the cutting mat. Leave a little bit of space (about 3mm) between the edge and where your first cut will be. Leaving some foam will give you some stability, but don’t leave so much that you have heaps left over. Start cutting around the first letter (H for me), using your thumb to keep the paper still. Be careful to keep your fingers out of the way of the blade as they are super sharp! Go slowly whilst you get the hang of it.
- Once the paper letter pops out you can lift the guide for a moment and carefully retrace the shape you made in the foam until the letter is loose and pops out. Having a sharp utility blade will really help with this.
- Check the letter and put it to one side.
- Line up the guide again, if you’ve left space between your letters on the guide, move the guide so the next letter has slightly less space between your first letter and your second. This is so you get the most out of your foam. Cut your next letter as before, removing the guide once the paper letter is loose and retracing until the foam letter comes out easily. (If you’re doing letters that have inside cuts as well as outside, like D or R or O, cut the inside lines first for stability.)
- Check the letter again and move to the side before moving on.
- Cut away the already completed letters on the guide after every second letter as this will make it easier to continue.
- Repeat until you’ve finished your first word. Once you’ve completed all the letters in one word, stop and have a look at them together.
- If you’re doing more than one word, line the first letter of the next word up next to where your last word ended. This is great for using as much of your glitter foam as possible.
- When you run out of space on that first line, move down to the next line leaving a small gap between where you have already cut and where you will start cutting. Lay it over as in step 2, and continue by repeating the instructions above.
- Once you’ve completed all your words in that glitter colour, stop and take a look at your work. Neaten up any edges if you like.
- Flip the piece of foam over and see how it also looks. You may be able to use the negative space foam letters for another project in future!
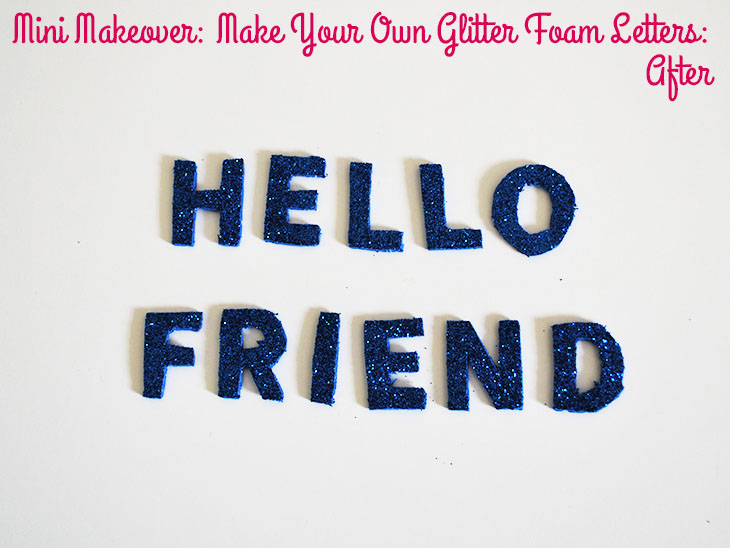
- Ta-da! Now you have your foam letters! You could add them to wrapping for a gift or even make your own birthday card with them. (or even your own stop motion video, like me!)

Thoughts on the project:
This is a lot of fun to do. It can be really time consuming and glitter is always messy! It’s fun to do if you have a specific reason, but depending on your materials, like the sharpness of the knife, it can get more difficult and tiring as you go on. I’d also warn against it if you struggle with imperfect things as no matter how precisely I thought I was cutting them, they turned out wonky (which I came to love, but can be a bit annoying).
I like to keep mine in small snap lock (ziplock) bags with a different one for each colour as, even though the glitter sticks quite well, sometimes the different colours mix when in the same bag. I wouldn’t recommend this as something to do with little kids, though you could prepare them for the kids and have them play with the letters later. They’d be great fun to play with on a rainy day.
The beauty of making them yourself is that you get to choose the font and the size that you really want and you don’t have to fret that you’re not getting what you want to (like you can sometimes when you buy sealed bags of things. I do enjoy making these, but sometimes forget the time it takes to make them. You could simplify this and just make one large glitter foam letter, which could look cool on a door or in a picture frame.
Have you ever made your own foam letters? How would you use them if you did? Tell me in the comments!
If you do try this, I’d love to see a photo or hear about how it went! Tweet me your pics at: @danniellecresp or instagram me at: @dannielle with the hashtag: #styleforahappyhome