Today I thought I’d share with you a fun way to display those fabrics you love, but you’re not quite sure what to do with, in a simple but fun DIY. These make great wall hangings and only take about 20 minutes max to make!

What You’ll Need and How to:
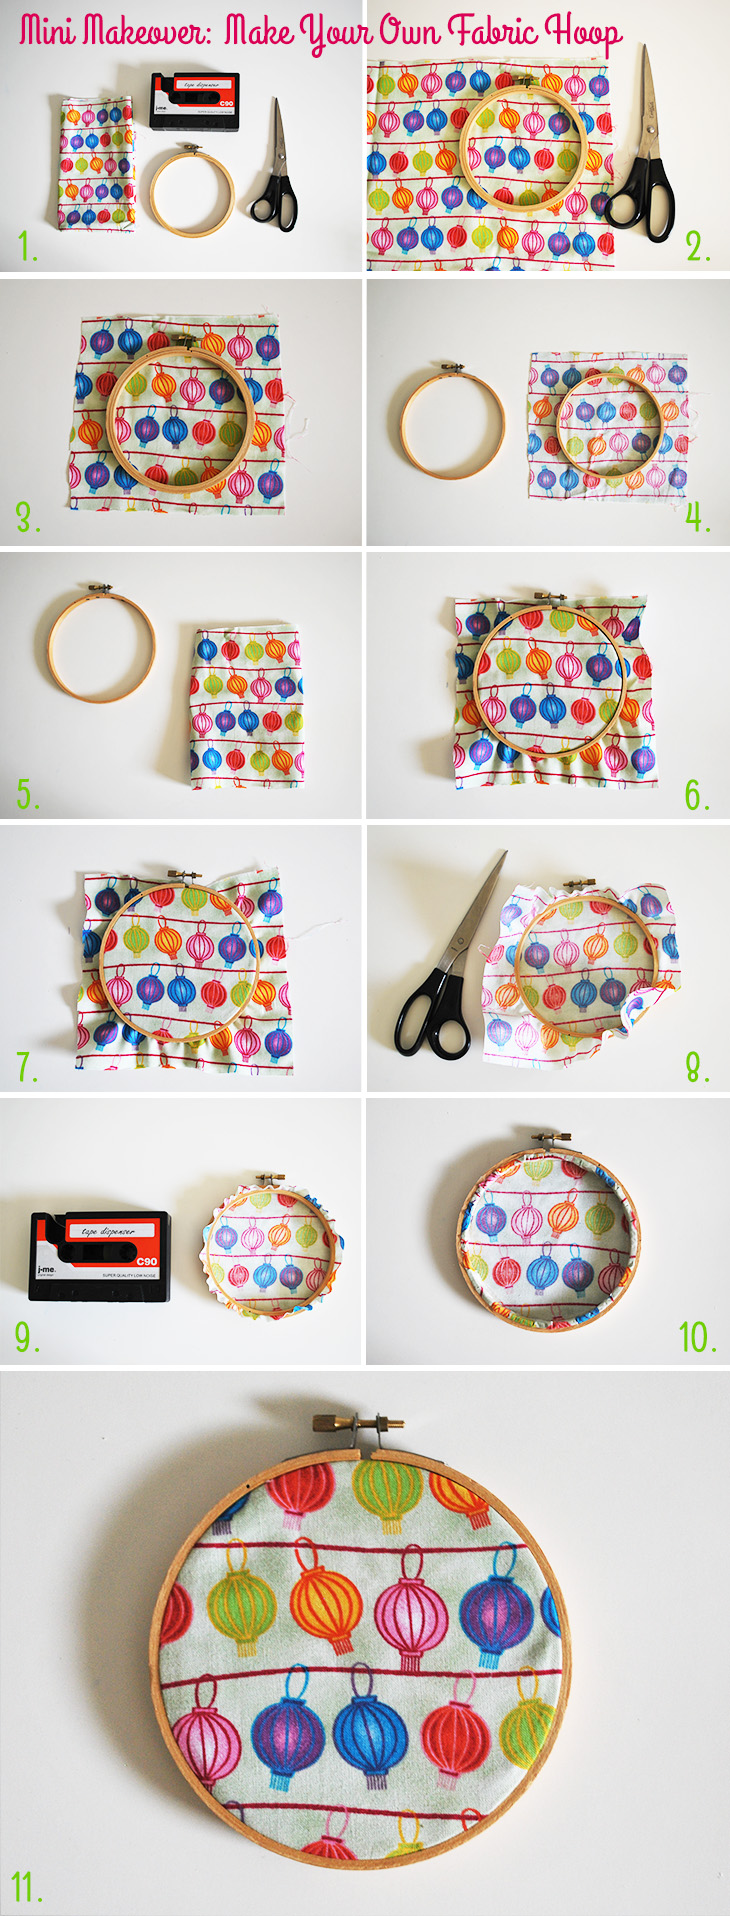
- First, Collect your supplies: Some fabric you love (mine is from a few seasons ago at Spotlight), An Embroidery Hoop (also from Spotlight around $3 I think), Sticky Tape and Fabric (or sharp) Scissors
- Open out your fabric and choose where the pattern will look best in the hoop by laying the hoop on top and taking a look.
- Cut the fabric with extra around the outside of the hoop. I prefer to do this as a rough square
- Take the embroidery hoop apart and leave the outside to the side. Flip the fabric to the wrong side and line up the inside hoop so that the best of your pattern is inside that hoop space
- Flip the fabric and the inside hoop over again so that the right side of the fabric is facing out AND the left and right side are loosely folded under
- Place the top/outside hoop over the top of the fabric and the inside hoop, adjust so the screw is at the top and carefully pull the fabric at the back to tighten. The fabric inside the hoop should have a little bounce to it when it’s tight enough
- Tighten the screw at the top
- Now it’s time to trim the fabric at the back. I like to leave approximately 1cm so it will fold in nicely at the next step. Don’t cut it too close or it may come out of the hoop and it can be a pain to try to get it to stay put afterwards
- Take your sticky tape and with small pieces fold the fabric down into the inside of the back of the hoop and tape it there. Continue until you have no fabric sticking up. There are lots of different methods for this depending if you want to use the hoop again. This is the hack that I like, as I won’t be reusing my hoops
- Check that it’s all stuck down and you’re happy with it. Then, flip it over
- Voila! Your fabric hoop is ready to be hung up!

Thoughts on the project:
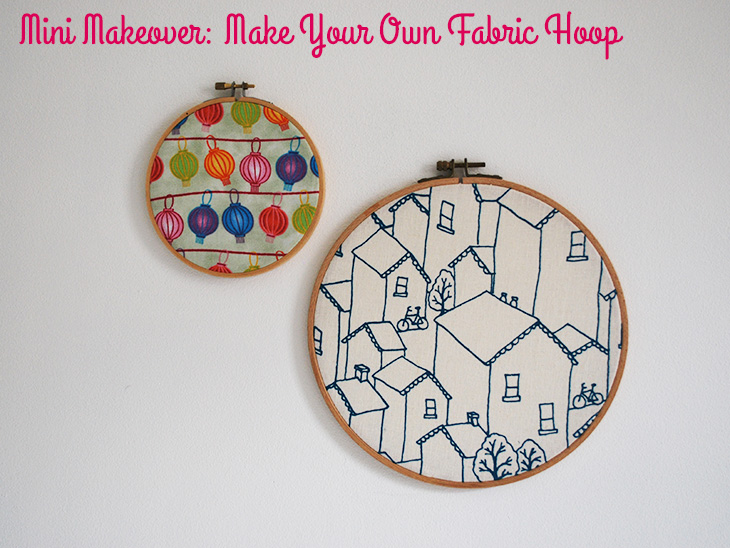
This is a quick and fun project that will add some colour to your walls. It can be really inexpensive to do depending on the fabric that you choose. My Ink + Spindle fabric for the hoop (lower hoop) is more on the expensive side. I think they look fantastic grouped on a wall in a child’s room or nursery or even to decorate a living space. I love that they only take about 20 minutes to make, and that’s factoring in the sticky tape not behaving the first time around. You could use an exposed nail to hang them, or use blutack at the top and bottom as they are easier to move around if you like to switch things up sometimes.
I think it’s a craft that you could do with school aged children as it doesn’t require too many parts and they could choose the designs that they like. The little hoops could also use scrap fabrics from bigger projects if you have a fair few scraps laying around.
I think I’ll slowly add more to my collection when I feel like the walls need something new to spruce them up ;)
Have you got any of these in your home? Or do you have some fabric laying around that would be perfect for this project? I’d love to hear.
If you do try this, I’d love to see a photo or hear about how it went! Tweet me your pics at: @danniellecresp or instagram me at: @dannielle with the hashtag: #styleforahappyhome
I’ve been meaning to do this for ages – yours look great! Thanks for the tutorial!
Thanks, Jane! Would love to see yours!