In last week’s mini makeover I showed you how you can make your own cork board letters for your home, but I know that some of us don’t really like the cork board finish or would like to use the letters just for decoration, so this week I’m sharing how to make your own covered cork letters that you can decorate in a style that suits your happy home with a bonus way to style them! Let’s get started!

What you’ll need:
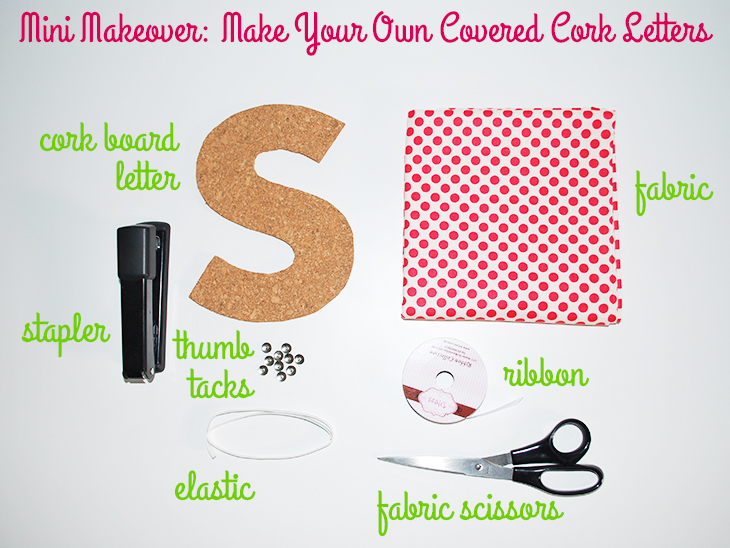
- Cork Board Letter(s) you can find out how to make them here
- Fabric You can choose any fabric that you love. This is cotton quilting weight. I got this from Spotlight for $7.99 per metre. You will need enough to cover all of your letters plus a little bit extra in case of mistakes. I used about half a metre for my 5 letters
- Stapler You’ll need a sturdy one that you can flip open
- Thumb Tacks (or Push Pins) If you want to use it as a cork board but prettier
- Ribbon For hooking things into the cork board if you want to use it as a message board
- Elastic Also for hooking things into the cork board if you want to use it as a message board
- Fabric Scissors For cutting the fabric
- Optional: Box of extra staples if you’re doing lots of letters you will need lots of staples
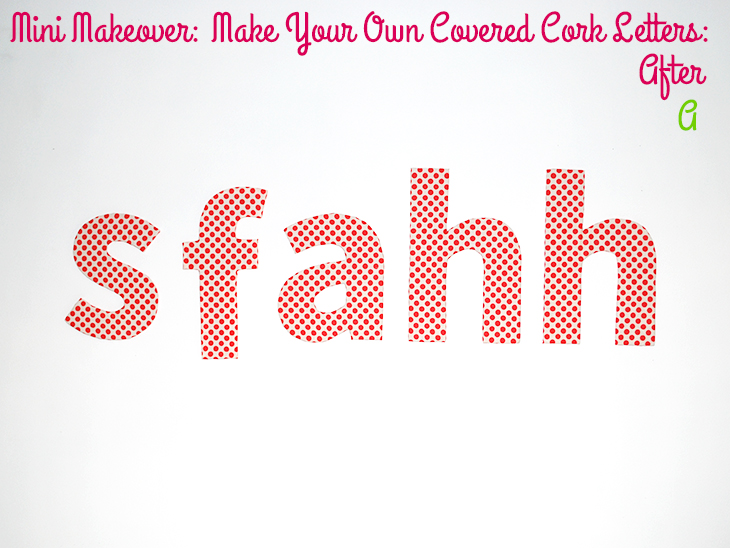
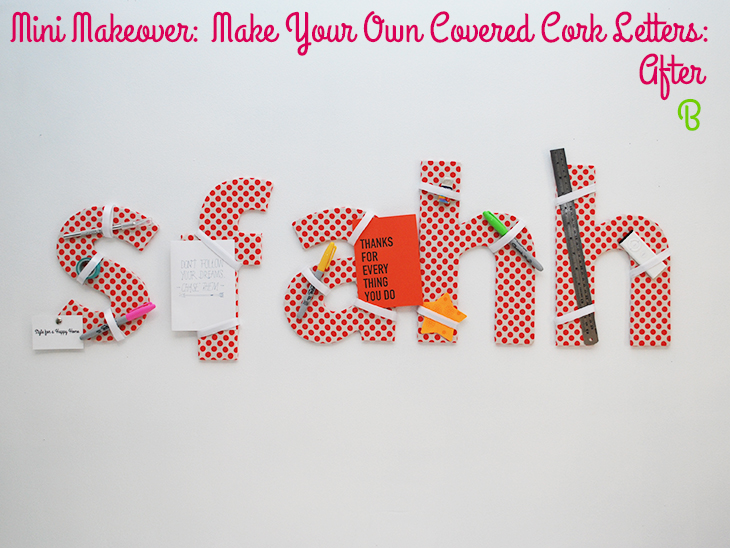
Note: Steps 1-14 cover your cork letters (as you will see in After A) and steps 15-18 embellish them with elastic and ribbon (as you will see in After B). 15-18 are optional steps

How to:
- Start by placing your fabric face down and add the cork letter on top of it. Cut the fabric so that it is a rectangle with approximately 5cm (2″) overhanging all four sides of the letter. The cutting doesn’t need to be precise and I like to have more fabric and cut off later rather than trying to work with too little.
- Flip the cork letter over so that it is back to front (so that the fabric will be on the outside of the finished letter, not the inside. If you’re feeling confused, lift it and the fabric piece up and look at the letter through the fabric, and check it’s the right way around. Also: if you’re using a fabric that has a pattern that has a right way up (ie is a picture) make sure that it and the top of your letter are facing the same direction (or it will drive you bonkers when you’re finished)
- Fold the top piece of over hanging fabric up over the back of your cork letter and staple in the middle towards the top edge. Pull the fabric a little bit so that it’s tight, but not so much that the cord bends off the table.
- Repeat the staples, pulling the fabric around the edge one bit at a time and then stapling. The edge should stay smooth and the bunching for any curves should all be at the back. To begin with, just do the top edge. Leave the short ends.
- If you have any inside curves like my S you will need to cut a couple of straight lines so that the fabric can fold around them. Cut up the middle and then cut a couple of smaller notches where the curve is. You’ll need to cut almost to the cork so you can get the fold. Please see photo for exactly how to. It’s easier to show than to write. This is the same for an internal gap (like in an a), add extra notches where there are curves or edges as needed.
- Pull the smaller pieces made from the notches up and over and attach with the staples then do the upper piece followed by the lower piece. This can be a little nerve wracking the first time, but is easier once you get the hang of it.
- Now it’s time to continue down one side bunching up at the back if there are any curves.
- Keep adding staples until you come to the end of your side leaving that open for now.
- Repeat step 5 for any additional curves as you come to them.
- Repeat step 6 for fastening the fabric around the curved edges, as shown here.
- Once both sides are completed it’s time to trim the excess fabric from the back, leaving the ends that aren’t yet attached.
- Trim the ends with about 3cm (1″) left over so that it’s a little bit too long, but not so much that it’s difficult to fold up.
- Tuck the sides under and then pull the piece up and over the end so that there won’t be any overhang showing from the front. Staple and then trim. Repeat for any other ends.
- Flip it over and check out your awesome handy-work! Yay! See After A. Continue for optional steps.
- Measure your elastic and cut it to fit around the parts of your letters that you would like to have something hang from
- Flip it over and staple the elastic to the back.
- If you would also like ribbon to hide the look of the elastic, cut it to size.
- Then add the ribbon at the back as before, but with a looser loop so that the elastic can stretch underneath it. Repeat until completed! See After B.


Thoughts on the project:
This is a really fun way to make some unique letters for your home. I love that it was really simple to do, once you have done the first tutorial, and the result looks fantastic. Whilst my first thought was to still have them as a working cork board, I actually really loved how they turned out just as covered letters. Not only can you choose a font you love, and make it in the size you want, you can also customise the fabric for your home.
It wouldn’t be too difficult to recover them over time if you decide you wanted a different fabric or when your child grows out of a kid themed print. I also love that they were pretty inexpensive to make, though they do take some time. If you wanted to you could do a shape rather than a letter, and that could also look great.
I didn’t really encounter many issues when covering these, the cork is more than thick enough to take the staples without them poking through the other side and the main thing to remember is to flip the letter over so that you cover the correct side. I got a little ahead of myself with the F and ended up covering the back! It was quick enough to recover the front, but I’d like to save you from my hasty mistake. ;)
When it comes to hanging them, you could sit them on a ledge or permanently affix them to the wall. I tried the double sided poster tape, but it couldn’t handle the weight, and you would need a lot of blutack to keep them up (and that’s without using them as a cork board. In the end I used some small screws with the looped ends and screwed them into the top of each letter and have them hanging from a nail. The H’s have two loops to keep them hanging straight (the second one over the curve). I was so happy with how mine turned out I’ve added them to my office wall above my whiteboard which I use as an inspiration board for the blog.
Would you make these for your home? What room would you put them in?
If you do try this, I’d love to see a photo or hear about how it went! Tweet me your pics at: @danniellecresp or instagram me at: @dannielle with the hashtag: #styleforahappyhome