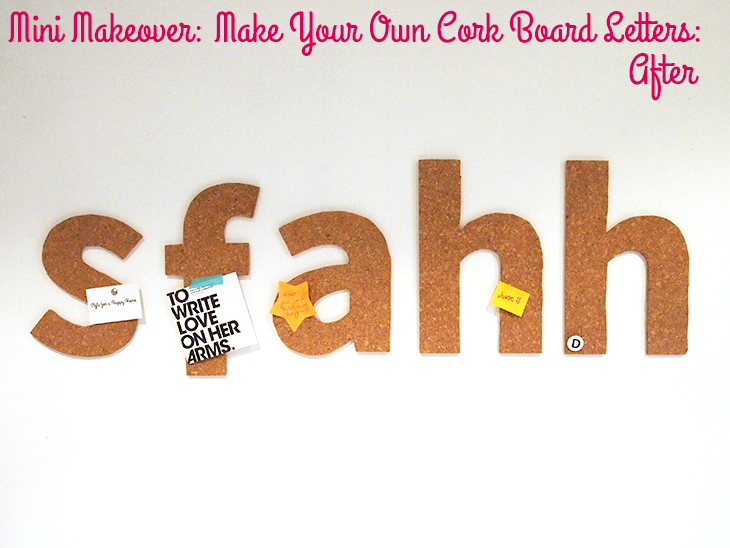
Cork boards are so handy to have around the home and in your office. They are great for keeping the things you need to remember close to hand and great for adding some inspiring messages and notes to. But they can look a little bit dull, so if you want a fun way of making a cork board your own, I think you’re going to love this tutorial I have for you today: make your own cork board letters! I gained some inspiration for this from this peg board that I shared over the weekend, but thought that it would work better as cork board for me (as I don’t have the technical skills for using those power tools).

What you’ll need:
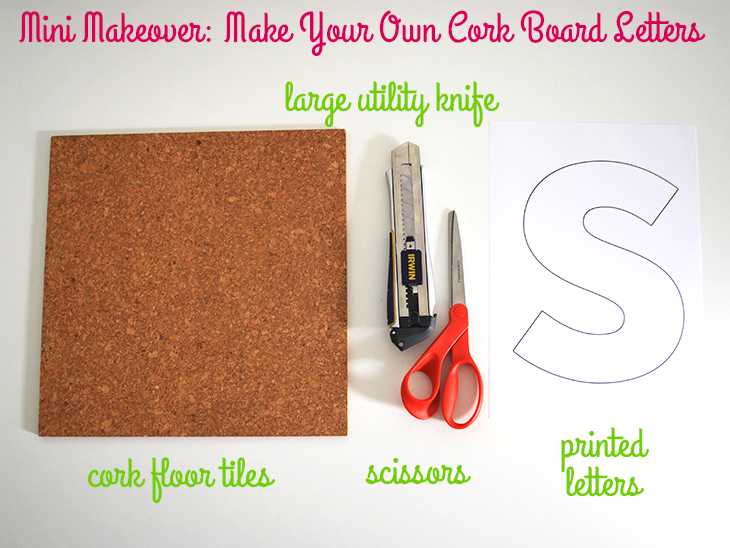
- Cork Floor Tiles I got these in a pack of 6 from Bunnings for $13.50. They are 305 x 305 x 6mm (12 x 12 x 0.23″). I chose these for their thickness and that they were widely available
- Large Utility Knife This is an Irwin 25mm Pro Touch Snap Off Utility Knife from Bunnings $19.98
- Printed Letters of your choice Can be made using Photoshop or Word
- Scissors For cutting the paper
- Protective Surface to Cut On like MDF or Cutting Mat For protecting your work surface. I used a 900 x 600 x 3 mm MDF sheet from Bunnings $2.33
- Optional: Double sided Removable Poster Tape For sticking the printed letters to the cork
- Optional: Sandpaper For smoothing the edges
Note: This tutorial is messy and you will get loose cork tile dust so you might want to keep a rubbish bin (trash can) handy. It’s also tiring on the arms and would be better as a weekend project if you’re planning more than one letter. It took me most of one day to make 5 letters. It’s a fun DIY, but it does take some time to make.

How to:
- Collect all your supplies and put any extra cork tiles and letters other than the one you’re going to complete first to one side. This tutorial can be time consuming, so if you’re considering doing a long name I would start with the first initial first so you can gage how long it might take. Place your protective cutting surface on the table you will be working at. I used a sheet of MDF.
- Make your letter(s) in Photoshop or Word if you haven’t already. I made mine to fit on an A4 page. The S shown above is a little bit smaller than a full A4 page as I wanted it to be the same font size as all the letters that I am using for my cork board and my F and H sit longer on the cork board. If you’re doing a series of letters check what size the longest and widest can be before choosing your font size for all of them. Print them out.
- Cut around the outside of the letters as neatly as possible as this will become your template. You could cut them all out first or just do them one at a time.
- Take your cut out letter and place it in the top left corner of one cork tile. If you like, attach some double sided removable poster tape to the back of the letter so that it doesn’t move. You could use other non permanent sticking material here if you like
- Slowly and carefully, cut a straight line down the right side of the letter and a straight line under the letter so that the excess cork tile has been removed. I recommend doing short, shallow cuts and repeating them until you are through the cork. With this cork, it will break away once your cut is about halfway through the cork. So you can carefully fold the unwanted cork piece back and if it has been cut through far enough, it will break away easily.
- Now it’s time to start cutting out your letter. Stop and have a drink of water if you need it and make sure your cutting surface is in the right place. Place the letter and cork tile on the surface and using the large utility knife, begin to cut around the outside of your letter. If you’re starting with an S like me, or any curve, do a short straight line from one point of the curve away from the letter. Lots of these repeated will give you your curve but be easier on your arms. I found it was easiest to to sharp shallow cuts repeatedly in the same 3 cm (1″) spot and then move one once I could either fold it to break it away or had cut through. I found that on average 15 cuts repeated in the same spot cut right through.
Repeat the cuts until the whole letter is cut out. With the areas where the S bends in (and the same with the h) I found it worked to cut the 3cm (1″) line on either side and then break a small section of the cork board off and then move further in, repeating and removing the excess cork gently as to not damage the part that I wanted to keep. It helped me not only see progress, but made the next 3 cm (1″) easier to cut. When cutting out the inside of the a I halved the length of my cuts and checked the back to see when the cut had made it all the way though. Once it had, I then carefully pushed it out through the back. - Optional step: Take the sandpaper and sand around all of the edges to get a smooth finish. I found this was great for where I had broken the cork board off rather than cut it all the way through. It just gives a nice finish to it.
- Now your cork board letter is complete! Repeat for any others you want to make, and affix them to a wall or door to start using them!

Thoughts on the project:
I decided to make the initials of my blog for my office wall and I really love how they turned out. This tutorial is on the long side and I was very tired after completing all 5 letters. I ended up needing a couple of hour break after the first 2.5, because my arm got quite sore and needed a rest. If you’re not used to doing this kind of manual labour, you might wake a little sore the next day, but I think if you spread it out a bit or made it a project that you shared with someone, it could still be something that’s not only quite fun to do, but also looks great finished.
You could probably do these on a larger scale with bigger pieces of cork and some power tools, like a jigsaw, but this size would be great for a child’s bedroom or even your office or studio. I love that you can choose a font you love, and whilst bold, thick fonts would be more effective, I love that you’re not stuck with one that someone else chose.
It will need a way to fix to the wall, which I haven’t quite found for our rented place yet. For this I used blutack and I can let you know that it’s not a great way to keep it on the wall for any length of time. I’m thinking of trying the removable poster tape, but if you’re not renting you could use something that’s more permanent. Another option could be to add ribbon to each one and hang each one from it’s own 3M removable hook, though they’re not the prettiest things I’ve ever seen ;).
If you love this idea but aren’t keen on the cork board finish, check back next week for another fun idea for them!
Would you make your own cork board letters? Where would you put them?
If you do try this, I’d love to see a photo or hear about how it went! Tweet me your pics at: @danniellecresp or instagram me at: @dannielle with the hashtag: #styleforahappyhome