* Sponsored Post for Spotlight for National Craft Month
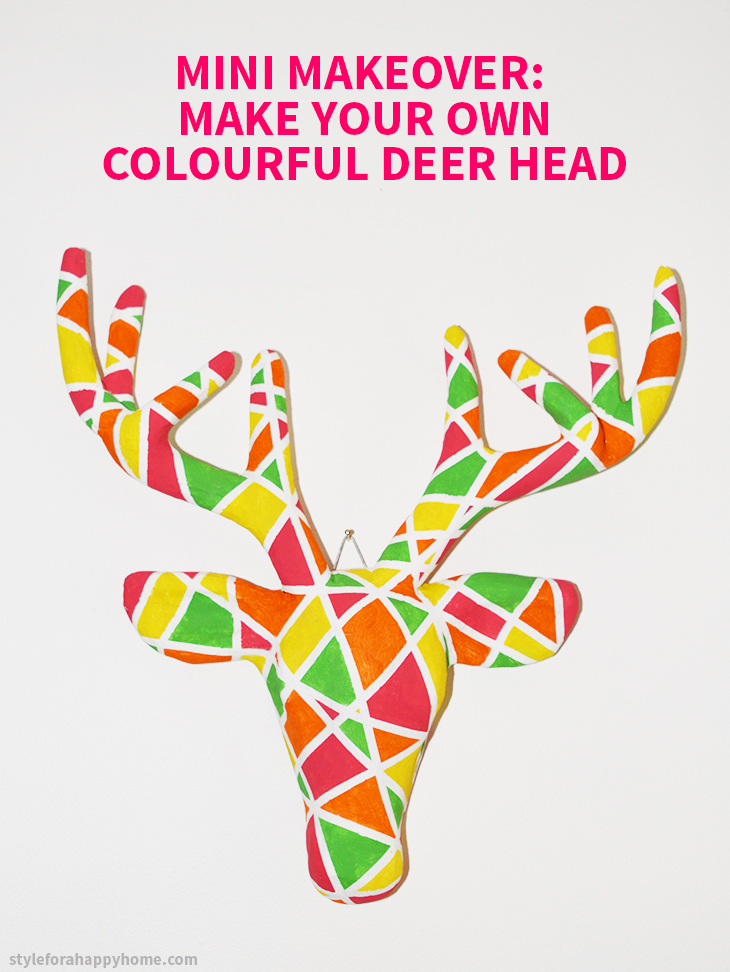
A couple of weeks ago, I got the chance to go to the launch of Spotlight’s National Craft Month. Not only was it a fun day of trying out some crafts and learning about what Spotlight has to offer us crafty folk, but it was also a chance to see the a project they’d asked me to be part of! Before the event, they asked some crafty bloggers if they’d decorate a paper mache deer head in their favourite style or material. I chose to paint mine and make it colourful, and I wanted to share how you can make one too!

What you’ll need:
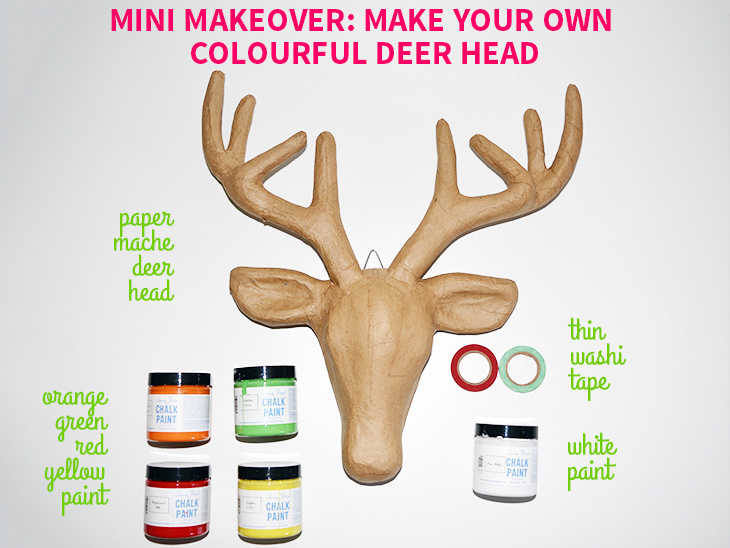
- Paper Mache Deer Head This is a Shamrock brand one that Spotlight sent me
- Coloured Paint I used Chalk Paint because I already had it in my studio (not from Spotlight) but any acrylic paint would also work. Be sure to adjust drying time, depending on the paint you choose. I used Orange, Green, Yellow, Red and White
- Thin Washi Tape 5mm width is best and I used all of one roll and a small part of the second roll. I got them off ebay.
- Paint Brushes 1 wider one for the white paint and 4 thin brushes (1 for each of your other colours)
- Mixing Tray if you need to mix your paints, mine is from Spotlight – purchased last year
- Protective surface so you don’t mark your table, I used butchers paper from ikea, stuck down with washi tape

How to:
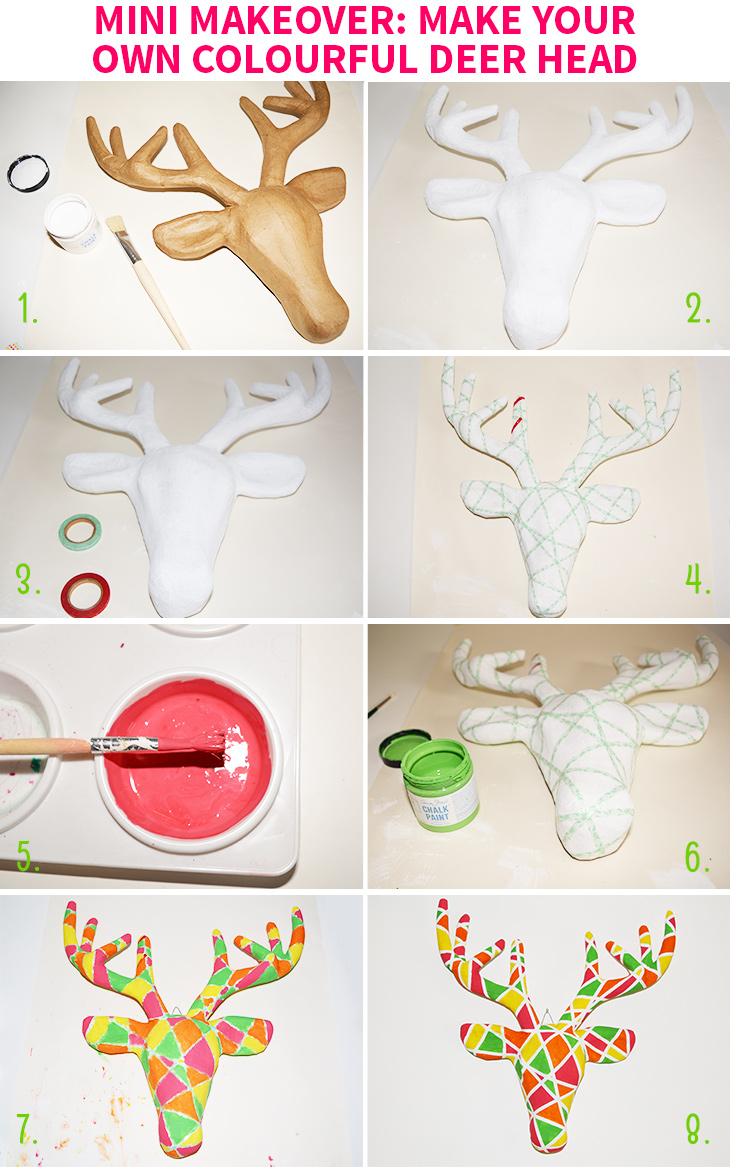
- First you’ll need to lay down your protective surface and get everything ready to start painting. Then take your wide brush and add white paint to it and start painting over your deer head until all the brown colour of the brown paper is hidden. Don’t forget to do the back of the deer’s antlers and ears.
- Leave to dry completely, before moving on to the next step. Some paints, like chalk paint, will dry faster than others, but for the next step to work, don’t skip this step.
- Once it’s dry, it’s time to make a pattern with the washi tape across the deer head. Start at the back and tape each piece across the front, making sure that it’s stuck firmly – with no bubbles, and wrap it around to the back. I started at the bottom and worked my way up, leaving some big gaps and some small. With the antlers I tried to use one continuous piece where I could and that made a really interesting pattern. I started at the back of the base of each antler and worked my way up and back down again.
- Use as much tape as you need. I added a few pieces of the second tape where the gaps felt too large.
- Now it’s time to mix your paint colours if you need to. I wanted a SFAHH style pink and I only had red, so I mixed the red with some white until I got the perfect raspberry shade.
- This next step is easiest if you have one small paint brush for each colour and you switch colours as you paint so you don’t have to guess which colour will go where and end up with a bunch of the same colour next to each other. I started at the bottom of the deer head and tried to make it so that the same colour was never repeated in the next gap. Paint right to the edges of the tape and even over them a little bit to ensure that you’ve filled the gap with colour. Even the tiny gaps got a different colour. I also painted the back side of the ears and the antlers so the colours follow around.
- Leave to dry completely. Once it’s completely dry, carefully peel off the washi tape. I found that last on, first off was the easiest, as if you try to pull too many pieces off at once you could damage the design. As you remove the tape, your design will start to emerge.
- Once you’ve finished removing the tape, admire your handy work and hang your deer head up!

Thoughts on the project:
This is really fun to make and makes for a great rainy day activity. The more tape you add, the more little gaps you have to paint, so that’s something to keep in mind when thinking about how much time you want to put into the project, or the ages of the people who you might want to try this with. Because I used chalk paint, you can see the brush strokes, but this will be different if you choose a different paint type. I’m so happy with how it turned out, I’m hoping to hang it on the wall when Spotlight have finished with it.
National Craft Month:
Spotlight’s National Craft Month runs for the month of April and they have some awesome events and online giveaways planned, if you want to participate. The two in-store events are Fabric Fiesta on April 2 and Crafty Party on April 23! More info on these events and NCM is available at their website.
Would you like to try decorating a deer head?
If you do try this, I’d love to see a photo or hear about how it went! Tweet me your pics at: @danniellecresp or instagram me at: @dannielle with the hashtag: #styleforahappyhome
Disclaimer: Spotlight invited me to the launch of National Craft Month and I received the Shamrock Deer Head to decorate in celebration of this. I was reimbursed for my time in creating this post. All opinions are my own and all other materials used were my own. Working with the right brands helps to keep this blog running and as always, I only share what I think will also be great for you. xD