*Retouch and Paint Provided by British Paints for Product Review
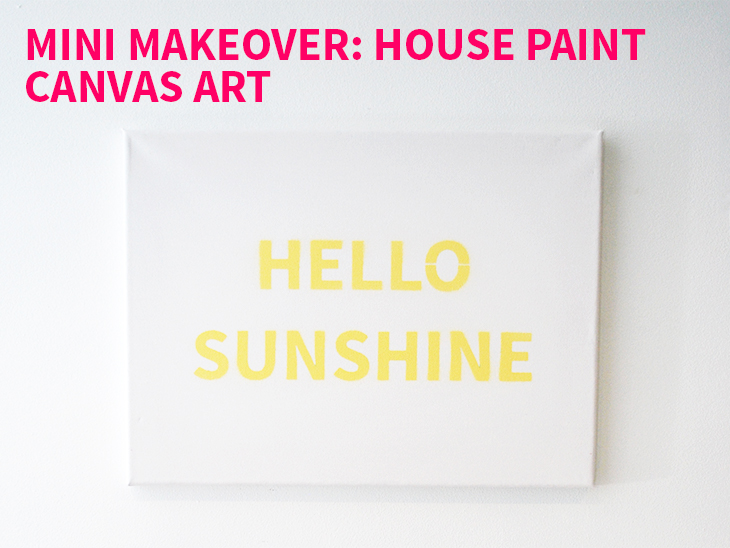
Recently the folk at British Paints contacted me about their new product the Retouch – a cool contraption that lets you turn your left over house paint into an aerosol spray – and I thought it would be fun to try out. The idea behind it is that you can use your house paint you already have to spray over scuff marks or damage to your walls without having to repaint the whole wall. It can also be used for spraying stencil art. Here’s what I made.
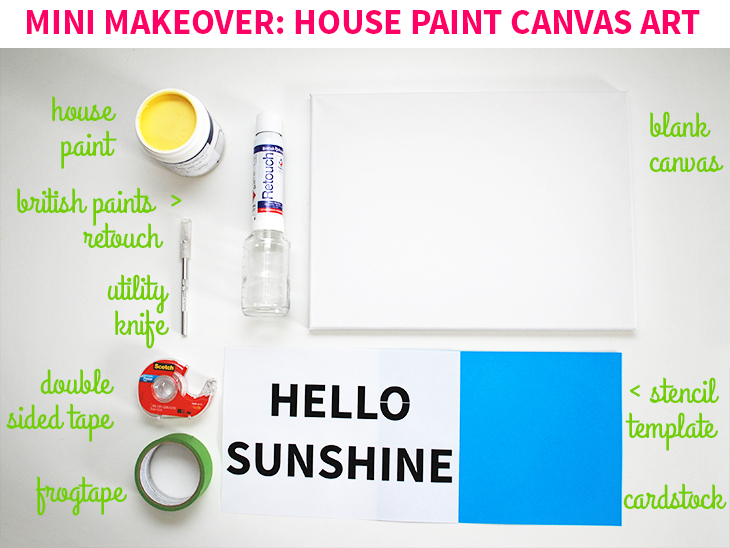
What you’ll need:
- House Paint British Paints sent me this paint in the shade: Happy Home
- British Paints Retouch British Paints sent me this for this review – they’re available at Bunnings
- Blank Canvas I got this from my local overstock store
- Stencil Template – you can download it here
- Cardstock – I used A4 200gsm in blue but any colour that contrasts to your paint colour is good
- Utility Knife – for cutting the template
- Double Sided Tape – preferably removable poster tape
- Frogtape
- Recommended: Funnel – for the paint
- Recommended: Dropsheet
- Recommended: Cutting Mat – for the stencil
- Optional: Baby Wipes – for cleaning up any accidental paint spills and overspray
How to:
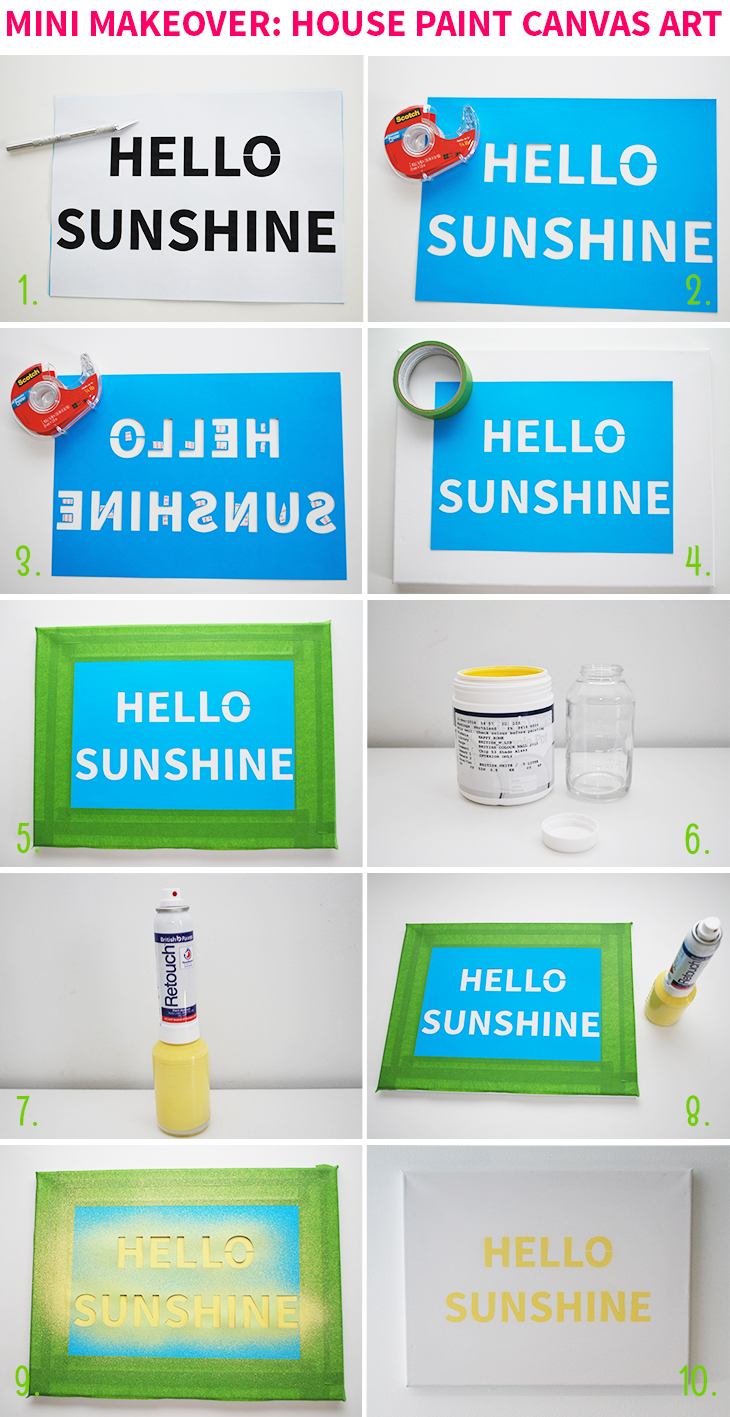
- Take your utility knife, stencil and cardstock and your cutting mat and leave the rest to the side. Place your cutting mat on a flat surface with the cardstock on top. Then lay the stencil on top of the cardstock so they line up. Then cut out the letters. I allowed for the o in hello to have show the centre, but you can cut through those little lines if you like.
- Next take the double sided tape and flip your cardstock over so it’s wrong way up.
- Add pieces of double sided tape to the spots that are likely to come away from the canvas when spraying. I only did a small amount and there was some overspray. You can add more than I did.
- Remove the backing of your double sided tape (if it has any) and affix the cardstock to the centre of the canvas. Then get your frogtape for the next step.
- Add frogtape around the parts of the canvas that are still visible. This will help to affix the cardstock and to stop any overspray. If you’d like a border, you can skip this step. Leave to one side.
- Now take the bottom part of the Retouch (the glass container) and your house paint. Using a funnel (with a dropsheet underneath) follow the instructions on the outside of the box. Add 150ml of paint (here’s where the funnel comes in handy – I used an old water bottle that I’d cut up) and fill water to the water line. Then add the lid (not the spray piece/atomiser unit) and shake for 1 minute. Note: if you make a mess with the paint, I found that you can clean it off glass (and my desk) with fragrance free baby wipes – random but true.
- Then remove the lid and add the spray piece (atomiser unit) making sure it’s on firmly.
- Now you’re ready to spray. Take it somewhere safe to spray (I went outside) and make sure that you have a dropsheet for overspray.
- To spray follow the instructions on the box, remembering that you can’t shake it like you could a spray can. Remember also to keep it upright as much as possible. I had trouble with getting the paint to come out of the atomiser unit, so I removed the atomiser unit and placed it in some water until the water sprayed through and then returned it to the glass contianer. It worked well after this.
- Once you’re happy with the spray coverage, and it has dried completely you can remove the frogtape and the cardstock. Your Canvas Art is ready to hang. Don’t forget to follow the instructions on how to clean the Retouch for storage too.
Thoughts on the project:
I always love finding ways to use what I already have around the home and house paint is one thing that there always seems to be left overs of. This is a fun way to do that. I could see the Retouch also being good for fixing scuff marks and paint damaged walls in your home, as long as you needed to do quite a few spots in the same colour. I’m not sure that the set up time would be worth just one or two spots as the 150ml of paint it recommends is quite a lot. The container does act as storage if you don’t use it all though. It would work well for homes that are painted in one colour.
Remembering not to shake the atomiser unit was tricky for me as I’m so used to doing it with the other spray cans, so it was a bit of a challenge to get used to. If you don’t have that habit, then it would be fine, and I did get used to it. I think it’s a good way for you to try spraying if you’re unfamiliar with it or you’re looking for house paint colours and shades that aren’t available in traditional spray cans.
I wanted something simple for my canvas but you could really make a stencil for anything you want and even do a negative space stencil with the cut out letters stuck on and the canvas painted around them. There’s a little bit of fuzziness on mine where I didn’t stick enough double sided tape, but I like that it’s an even fuzziness.
Overall, it’s a clever product once you get the hang of it and I can see it being a handy thing to have in my home.
What would you have on your stencil for house paint canvas art in your home?
If you do try this, I’d love to see a photo or hear about how it went! Tweet me your pics at: @danniellecresp or instagram me at: @dannielle with the hashtag: #styleforahappyhome
Disclaimer: I received this paint and Retouch from British Paints for the purposes of review. I was not paid for this post other than the paint and Retouch I received. All opinions are my own and I paid for the other items in this post with my own funds. As always, I only share what I think will also be great for you. D x