Today I wanted to share with you a fun way to keep all your Greeting Cards and Writing Paper organised so that when you need to write some last minute correspondence (and maybe some post Christmas thank you notes), it’s all there ready and waiting for you! As much as I’d love to say, that I’m too organised to need anything last minute, often I intend to start earlier, but I get distracted and life gets in the way. This will make for much less rushing around to find a card and some stamps when I need to post something off quickly.

What you’ll need:
- A5 Folder (or a folder size of your choice) – I got mine from Officeworks was $3.99
- Tab Dividers (or cardboard to make your own) – I could only get A4 so I had to cut mine down to size, also from Officeworks $3.25 for the 10 tab extra wide divider packet
- A5 Plastic Pockets (or whatever folder size you chose) – These were also from Officeworks and were $10.22 for a box of 100
- Birthday Cards – This was from Kikki-K ($4.95)
- Thank You Cards – The left one I designed and had printed by moo.com, the right is from Kikki-K ($7.95)
- Condolence Cards – This was from Kikki-K ($4.95) – These are good to have on hand as a quiet gesture when your friend or loved one might need it most
- Congratulations Cards – I got this in the UK about 8 years ago from Paperchase (price unknown)
- Good Luck Cards – I got this in the UK about 8 years ago from Paperchase (price unknown) – these cards are great for surprising someone who has upcoming exams, especially if they’re far away
- Leaving and Bon Voyage Cards – This was from Kikki-K ($3.47)
- Christmas (or Holiday) Cards – The left one I designed and had printed by moo.com, the right is from ikea (set of 10 – $10)
- Blank Cards and Notelets – The left is from a now closed Etsy shop and the right is from a Kate Spade stationery set I bought in NYC – Blank cards are great for any occasion – they’re my favourite to have on hand
- Writing Paper with Envelopes – I got this set from Kikki-K about 3 or 4 years ago (price unknown)
- Gift Wrap (or colourful paper of your choice for the cover) – I got this from a local shop called Wrappings for $3.99
- Washi Tape – This is from the MT Tape pop-up in Melbourne Central (was $4.95 from memory)
Here’s how you do it:
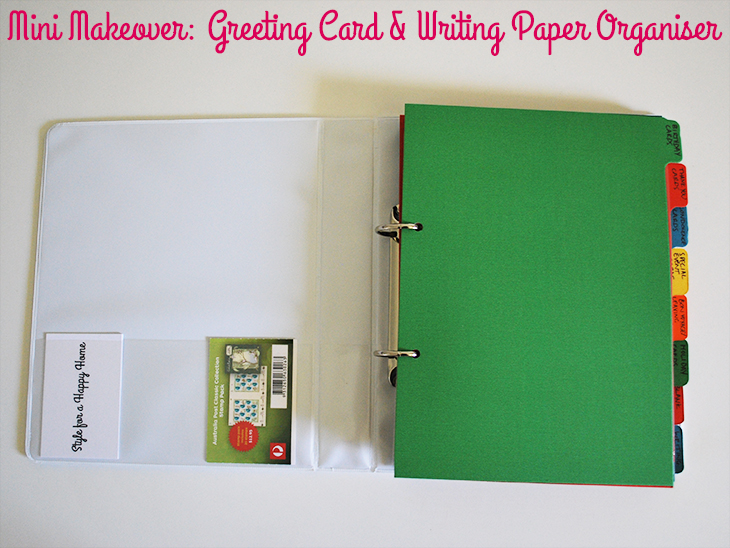
Once you’ve got all your materials, first decide how many tabs you will have and what they will be. I decided on 8 tabs (as they fit nicely in the folder): Birthday Cards, Thank You Cards, Condolence Cards, Special Events Cards (congratulations, baby shower, good luck, religious celebrations like christenings, etc), Bon Voyage/Leaving Cards, Holiday Cards, Blank Cards and Writing Paper.
If your tabs aren’t cut to size, then carefully measure them twice (just to make sure) and then cut them. I used a CARL brand guillotine but a pencil, a ruler and some scissors will work just as well. You could also make your own and cut them to size. I’d recommend a thicker cardstock than regular paper as they might rip at 80gsm. This would give you much prettier colours than what I have. Also use a hole punch that matches your ring binder.
Now label your tabs with the titles you chose and in the order you prefer. I didn’t choose my order for any particular reason, just what I thought I’d probably use more of towards the front and I wanted the writing paper in the last tab. Whatever works best for you is great!
Get the number of plastic pockets you think you’ll need (at least one for each type of card or writing paper – I have 11) and add the cards/writing paper sets to each one. If you have more than will comfortably fit in one pocket, use an extra one so you don’t overfill it. I also added some matching coloured cardstock to each of the plastic pockets, just so they would sit nicely, and had a bit more structure.
Now you can take your folder and add the tabs and the plastic pockets (with the cards and writing paper in them) and add them to the folder. I like to start with the lowest tab and work backwards to the top, but you can do it whatever way is best for you. Also add some business cards (if you have them) and a book of stamps to the inside cover, so you’re not rushing around looking for them when you need to send a quick note to a client or a friend.
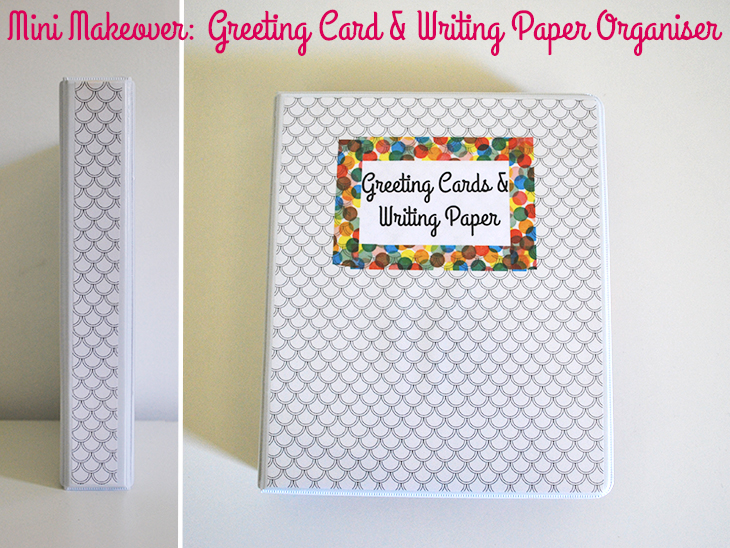
To add some finishing touches, create a label for your organiser on your computer and print it out (or you could hand write it or use a Dymo labeler if that’s more your style), pop it aside for a moment and cut your gift wrap or coloured paper to the size that will fit in the inserts (if you have them), or will cover the folder.
Place your label on the gift wrap/coloured paper and affix with the washi tape. Carefully insert the cover into the front. If you also do the side piece, cut it a little bit too small for the gap, as it may take *all* your patience to insert it without the paper crumpling (as it may have done with mine) ;).
Thoughts on the project:
I felt like A5 was the best size for this project, because I didn’t want all the cards sitting at the bottom of an A4 plastic pocket, but this size came with it’s own challenges, as it was difficult to find what I really wanted. I would have preferred to have had a folder that didn’t have the inserts on the outside and was just a great, bright colour to begin with, but I couldn’t find anything like that. Depending on where you are in the world and how much time you have to search, you might find something that’s perfect for you. I also considered using a slip in photo album, but not all the cards and the writing paper would fit.
I love how it turned out and that I now have a go-to spot on my bookshelf for whenever I need to send some quick correspondence and I know it will make me feel super organised when I do! I also love that it keeps everything in the one spot and is neat and tidy. I think the challenge will be to keep it stocked once I use a few cards (especially making sure that I have stamps! I always forget the stamps!!)
I think it would be a great idea to keep an eye out when you’re shopping for cute cards that are on sale, rather than just buying up a bunch all at full price, or supporting your favourite handmade stationer so you have some lovely cards at the ready. Don’t feel the pressure to buy a bunch of cards and writing paper you don’t love, just to fill the organiser. Make it something that you add to over time. But if you do have a heap of them already spread about the house, this is a fun way to keep them all together.
Yours will probably look a lot different to mine, depending on what celebrations are important in your life at the moment. You might have lots of age birthday cards that are similar in age to your children or you might have ones for a religious celebration like a christening or a communion. Maybe you have a bunch of 40ths coming up in the next couple of years and you want to have them on hand? The best part about making your own is that it can be made just for you!
Do you have something like this for your correspondence? Do you still send snail mail when you can? I’d love to know, share with me in the comments!
If you do try this, I’d love to see a photo or hear about how it went! Tweet me your pics at: @danniellecresp or instagram me at: @dannielle with the hashtag: #styleforahappyhome
Great idea especially cutting down the dividers
Thanks Melissa! :)
I love this, Dannielle – it’s my mission for 2014 to be the a year of card-sending!
That sounds awesome, Susie! What a good idea! I hope you find this helpful :)