The winter school holidays are about to start in this part of the world and that often means that parents and kids are spending a lot of time inside together, sometimes with requests for things to do or statements of “I’m bored” being shared. So I thought I’d share an easy and fun craft that you can try with the kids that they can wear afterwards! It’s a glitter heart t-shirt. (You can easily switch the heart for another symbol if hearts aren’t popular in your house).
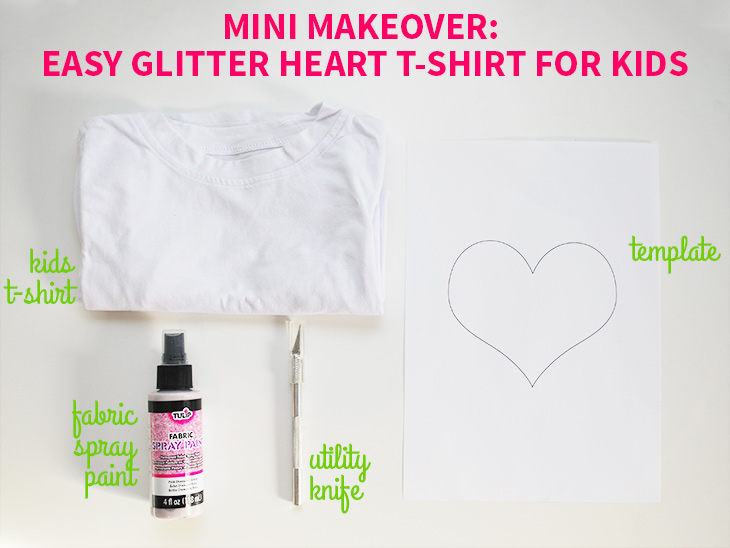
What you’ll need:
- Kids T-Shirt White is preferred but the glitter will most likely show on other t-shirt colours. I bought this t-shirt at Spotlight
- Template Get the A4 Heart template I made here print on 200gsm cardstock if possible
- Fabric Spray Paint This is Tulip brand in Pink Diamond Glitter (from Spotlight*, other colours are available)
- Utility Knife for cutting out the template
- Cutting Mat for cutting out the template
- Thick Sheet of Cardboard for placing inside the t-shirt
- Optional: Masking Tape if you want to secure the template to the t-shirt
How to:
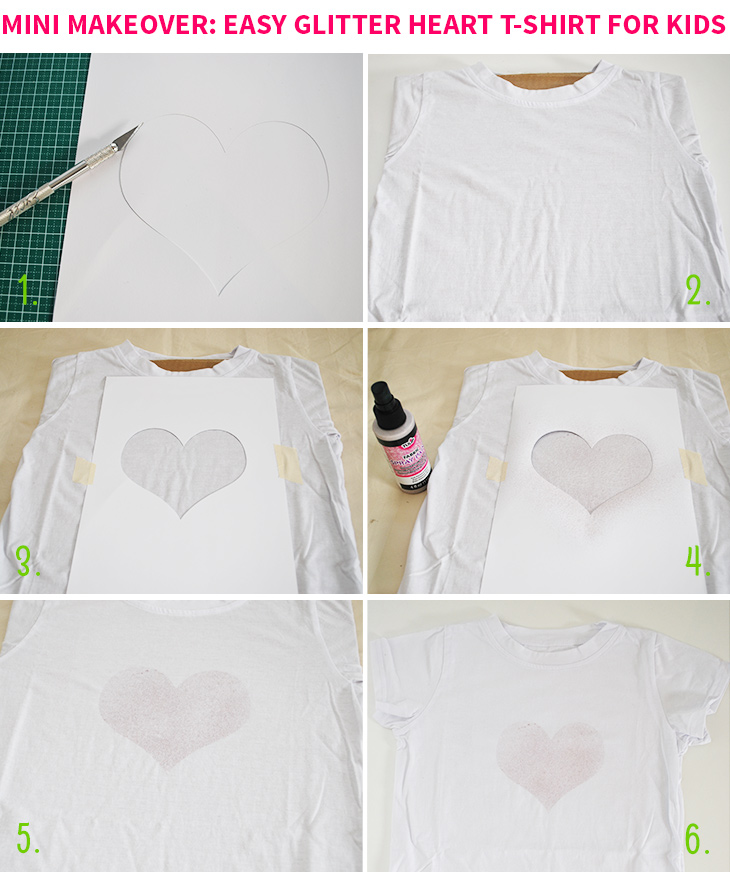
- First start by printing your template onto 200gsm cardstock. Then get your cutting mat and utility knife and cut out the heart shape. Place the heart shape to the side and keep the outside piece. You can create a different shape if you like.
- Next, prepare your t-shirt by adding the thick cardboard (I used one side of an old ikea box) to the inside of the t-shirt so that the paint won’t go through to the back of the shirt and lay down some plastic or a couple of layers of an old sheet so you don’t damage the table or surface you’re working at
- Now line up your template on the front of the t-shirt where you want the heart to be and fix with masking tape if you want some extra stability
- Now it’s time to use the fabric spray paint. Check the instructions on the back before spraying and spray about 20cm from the t-shirt, shaking the bottle as required
- Once you have completed spraying your pattern. Leave to dry for a while, then remove the template. Check drying times on the bottle!
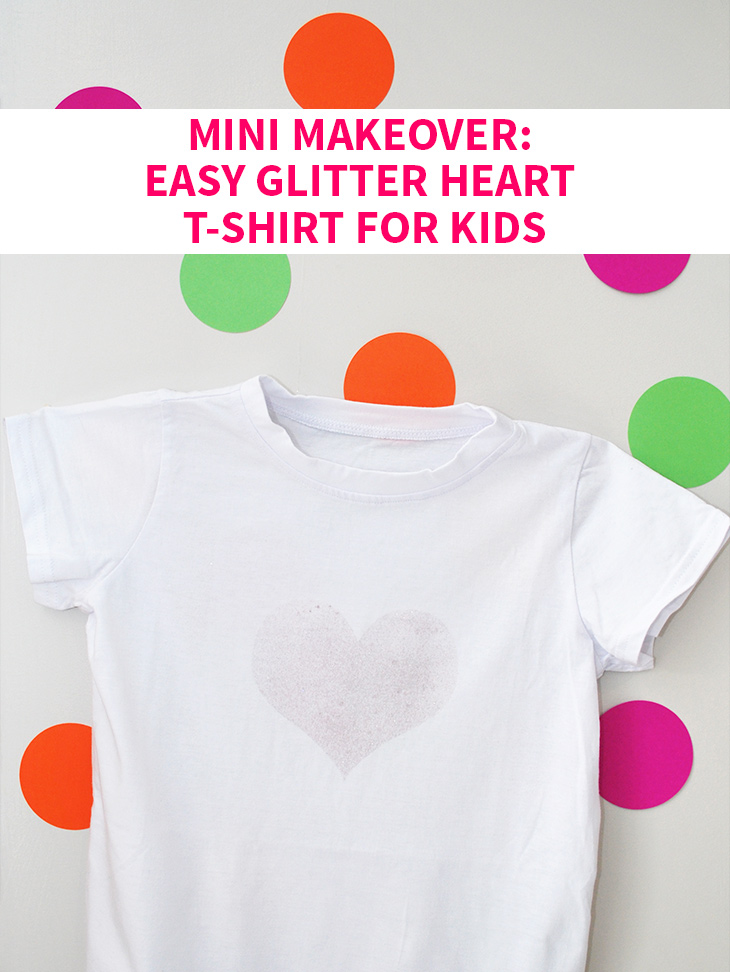
- Now your t-shirt is ready to go! Yay!
Thoughts on the project:
This was a really easy project to do. The Pink Diamond Glitter fabric spray paint did come out quite light, so you could add another element to the DIY by first using the template with a pink fabric marker and colouring in the heart area in a bolder pink and leaving to dry first. Whilst parents may need to cut out the template for younger school children, most of this tutorial can be done either with them or by them.
You can easily change the template to something that appeals more to your children and even the colours of the fabric spray paint. This would also work well on calico bags if t-shirts or long sleeve tops aren’t something they wear. The longest part is waiting for the paint to dry, but I love how fun it turned out! It makes for a fun rainy day activity, especially for craft interested tweens.
Do you craft with your kids on school break? Would you try a t-shirt or a bag?
If you do try this, I’d love to see a photo or hear about how it went! Tweet me your pics at: @danniellecresp or instagram me at: @dannielle with the hashtag: #styleforahappyhome
Note: This is SFAHH’s 300th post! It’s taken just over 2 years to make it to this milestone, but I wanted to say thanks for coming on this journey with me! Here’s to many, many more! x
*This post includes fabric spray paint that I received at an event hosted by Spotlight. This post isn’t sponsored by them. Everything else in this post was purchased by me. My aim by sharing shop names is that you know where you can find the cool stuff too! x