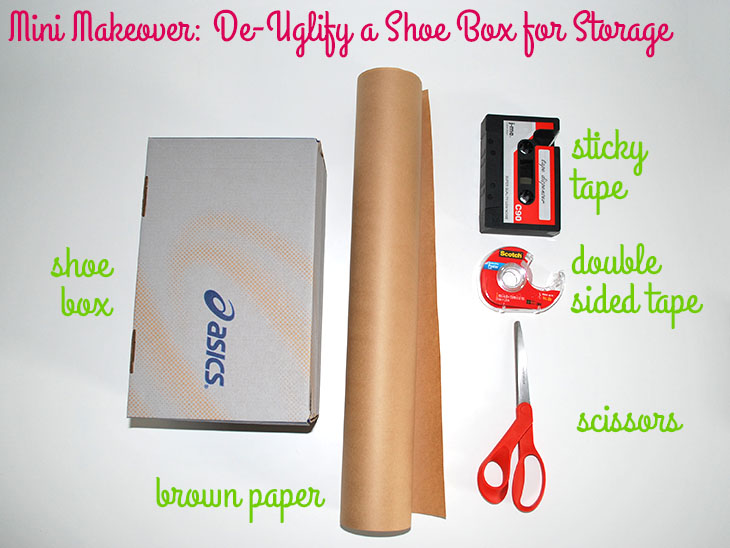
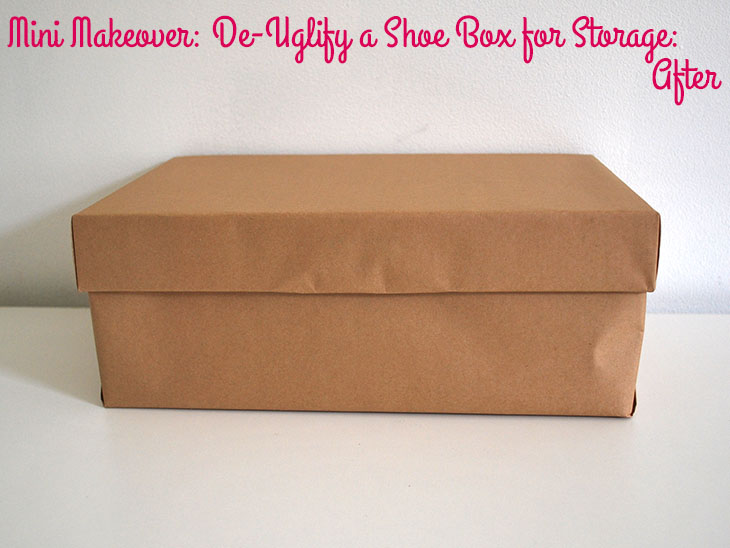
Shoe boxes make great storage containers. They can hold a whole range of stuff and help our homes feel neater, but there’s no doubt it: they aren’t pretty! Instead of always popping down to the shops to buy more storage, we can use these boxes we have available, but to make them blend in a little more there’s an easy way to de-uglify them: cover them up!

What you’ll need:
- A Shoe Box old boxes from electrical appliances work well too!
- Brown Paper or wrapping paper of your colour choice
- Sticky Tape
- Double Sided Tape
- Scissors
How to:
- First, take your shoe box and wrap the brown paper around it so that it covers the whole box plus about 5cm extra and cut it
- Place the shoe box on the inside of the brown paper (this is more important if you have a pattern on one side – make sure the pattern is on the outside)
- Open the lid. If the lid is connected, like in this tutorial, leave it open. If it comes off, place it to one side
- Move the shoe box with the side that doesn’t have the lid attached closer to the left edge of the brown paper. Line it up so that it is sitting in the middle horizontally with the top and bottom edges of the brown paper parallel to the short sides of the box
- Take the left edge of the brown paper and pull it up so that it covers the front side of the box with 2.5cm extra. Fold the extra 2.5cm over to the inside of the box, but before creasing cut straight lines in the brown paper on the 2.5cm extra bit so that it folds neatly inside the box and stick with sticky tape
- Gently give the back side of the box a push into the brown paper to make sure that the brown paper is firm on the box
- On the right side, take the loose 2.5cm extra that is left over from the cut and carefully pull it around the corner and fix it with sticky tape inside the box. This will make a fold in the brown paper on approximately a 45° angle
- Fold the angled piece up to the side of the box and attach with sticky tape on the inside of the box
- Repeat steps 7 & 8 for the left side
- Now you will have a big piece of brown paper hanging out the back of the box, take the right side and carefully push the extra brown paper in between the box and the big piece of brown paper. This should create a matching straight edge so that the fold on the brown paper is in line with the edge of the box
- Let that go loose for a moment and repeat for the left side
- Cut a straight line on each side on the inside right at the lid fold This is so the internal fold in steps 10 & 11 don’t continue on the lid of the box
- To ensure that the folds are secure add some double sided tape to the inside of the brown paper where the internal creases were made and pull them tight
- Now fold the paper over the lid and around the lip on the front, there should be approximately 2.5cm of extra that can be folded under and cut with straight lines in the same way as step 5
- To get the nice straight edges on the left and right push the excess in between the box and the outside brown paper and make a fold that lines up with the box corner fold extra under and secure with tape
- Neaten up any loose brown paper. If the lid is separate also cover it
- Add items to it and put it on a shelf

Thoughts on the project:
This is a great way to reuse your shoe boxes and other old appliance boxes without having to put up with their colours and design. Depending on whether you need straight lines on your edges it can either be a simple process or a more challenging one. If you decided to use a coated gift wrap you could probably use a craft glue and you could cut all the edges to size. If you wanted to make them extra special you could buy some of those individual letter stickers and mark them that way.
I personally love the brown paper for it’s ability to blend. We have an old toaster box in a bookshelf and for the longest time it would bother me to look at it every time I walked past. I finally covered it in brown paper and it blends so well into the bookshelf I forget that it’s there.
This could be a great rainy day activity for school aged kids. Particularly if they have some treasures the want to keep safe or you just want to get them involved with keeping things tidy. This was a very particular way of going about covering the box, but what I like about it is that you can choose how you want to cover the box and just so long as it no longer looks like an ugly shoe box, you’re winning!
Do you use shoe boxes for storage? Do you make them pretty or just leave them as is?
If you do try this, I’d love to see a photo or hear about how it went! Tweet me your pics at: @danniellecresp or instagram me at: @dannielle with the hashtag: #styleforahappyhome