Some of the DIYs for our home can feel so big that we never get around to starting. Sometimes we want something that’s quick, simple and inexpensive to make our homes feel a bit happier and brighter. Today I want to share a tutorial with you that’s all three of those (quick, simple and inexpensive). Yay! These easy framed art pieces are especially great if you have some frames you want to hang but don’t have the prints or photos you want for them yet.
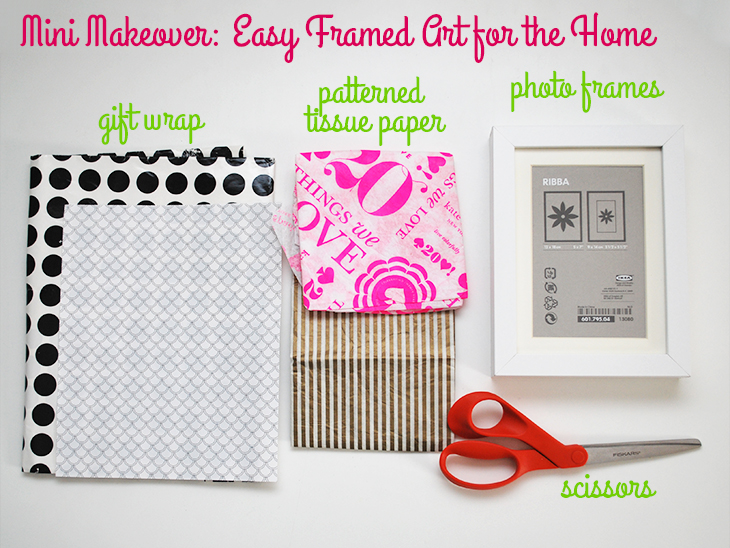
What you’ll need:
- Photo Frames I got mine from IKEA. They are the Ribba frames that fit a standard photo inside the mat board (4×6″)
- Gift Wrap You can use gift wrap that you like that you already have or get some from a gift shop, supermarket or discount store that has a print you like. I used gift wrap from a gift I received and some I had from a previous mini makeover.
- Patterned Tissue Paper You can get this from a gift store, etc or even from special purchases you made (if the tissue paper is in good condition – not ripped). I got these from two separate Kate Spade purchases. The stripes came in the shoe box with my flats and the 20th anniversary paper came from the carry bag that came with my handbag.
- Scissors
- Optional: Washi or Masking Tape for keeping the patterns straight in the frame
How to:
- First prepare the photo frames and the mat board by pulling up the back of the frame and then giving it a wipe over with a clean dry cloth and place it to one side. Then wipe the mat board and place to one side as well.
- Next take the cloth and carefully wipe the glass on the inside of the frame to pick up any particles that might be sitting on the glass. Do this whilst the frame with the glass in it is on a flat stable surface. Move it to one side
- Take your gift wrap or patterned tissue paper and your mat board and line the mat board up over the pattern that you’d like in your frame. Carefully cut your gift wrap or tissue paper so that the pattern you want to show will appear inside the mat board. Make sure to cut the gift wrap or tissue paper so that there is an overhang that you can attach to the back of the mat board.
- Lie the mat board face down on the flat surface and line the gift wrap or patterned tissue paper (also face down) over the cut out. Pick them both up to check that the alignment is correct and use a piece of washi tape (or masking tape) to affix it to the back of the mat board.
- Lay the mat board flat again and affix the gift wrap or tissue paper at the base also. Pick it up and check the face side looks good and add extra tape at the back if necessary
- Now add the mat board and ‘print’ to the glass frame and back with white paper if needed (I did this where the tissue paper was transparent).
- Holding the mat board and glass in, carefully pick up the frame and check which way is up for the print and place the top end away from you on the flat surface. Also check that there’s no stray crumbs or marks on the inside of the glass that will annoy you later.
- Now add the back of the frame in carefully, top facing away from you and once again hold it all together and check the mat board is still centred before placing it back on the flat surface and closing the hooks so that it doesn’t come apart.
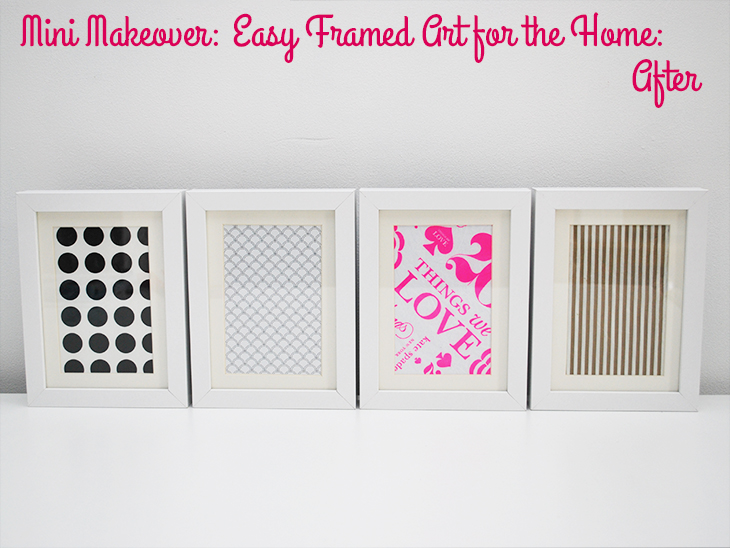
- Repeat for as many frames as you like, and you’re ready to place or hang them!
Thoughts on the project:
This is a fun and simple project that can be done in less than an hour, depending on how many you want to do. These make great place holders whilst you’re looking for the perfect art piece and are also great for kids rooms. You could use special wrapping paper from gifts that had significant meaning or just a pattern that took your fancy.
The frames are inexpensive and easy to get a few matching ones in all different sizes. You could also use things from your travels or old road maps of places that mean something to you. You could even do this for special fabrics that you want to remember, like a scrap from the fabric that made your wedding dress or something like that.
You could also use Christmas gift wrap during the festive season to make your home feel a little more christmassy without you having to go all out. These will brighten my walls until the next cute patterns take my fancy and I’ll swap them over!
What would you frame in these?
If you do try this, I’d love to see a photo or hear about how it went! Tweet me your pics at: @danniellecresp or instagram me at: @dannielle with the hashtag: #styleforahappyhome